• Home
  • Start Here
    • About Dukes and Duchesses
    • Collaborate/Contact
    • Privacy Policy
  • Holidays
    • New Year’s Eve/Day
    • Valentine’s Day
    • leap year
    • St. Patrick’s Day
    • April Fool’s Day
    • Easter
    • May Day
    • cinco de mayo
    • Mother’s Day
    • Father’s Day
    • Fourth of July
    • Halloween/Harvest
    • Thanksgiving
    • Christmas
  • Crafts
    • general crafts
    • Cricut projects
    • printables
    • painting
    • sewing
    • knitting
  • DIY
  • Repurposed
  • Parties
    • Birthday
    • Entertaining
  • Recipes
  • Home Decor
    • Decor
    • home improvement
    • plants and garden
    • housekeeping
    • organization
  • travel
    • general travel
    • Dallas

Dukes and Duchesses

Dallas Fort Worth Creative Lifestyle Blogger

building creative projects Halloween/Harvest · Written by Randi Dukes

A Hexagon Pumpkin

465 shares
  • Tweet48
  • Share33

Kreg Tool Company provided me with the Kreg tools used to make this DIY hexagon pumpkin but all ideas and opinions are my own.

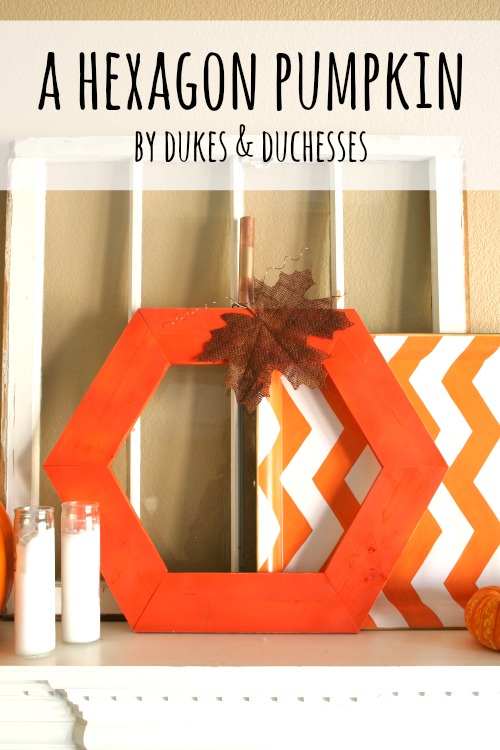
Geometric shapes and patterns are such a fun trend this fall and this seasonal project embraces the trend in a super simple project: a DIY hexagon pumpkin!  And while this project looks a bit involved, it’s simple enough for a DIY newbie.

a hexagon pumpkin

To start, you’ll need a long piece of 1×4 wood.  Cut it into six pieces.  My Dad reminded me that my pumpkin is actually not a true hexagon because I made the top and bottom pieces a bit longer to give me a slightly squat pumpkin.  Take creative license to get the look you want but be sure to make the four side pieces equal to each other and the top and bottom pieces equal to each other.  My side pieces are approximately 7 1/2 inches in length {on the shorter, inner edge} and the top and bottom pieces are approximately 9 1/2 inches in length {on the shorter, inner edge}.  For each piece, make the cut at a 30 degree angle using a mitered saw.

hexagon wood shape

To attach the pieces, I used the DIY Project Kit {affiliate link} which includes the Kreg Jig R3 {affiliate link}.  I love this little tool and sort of think of it as the baby Jig.  Both the drill bit and the jig body are easily adjusted to accommodate the size of the materials being used …

kreg jig jr set

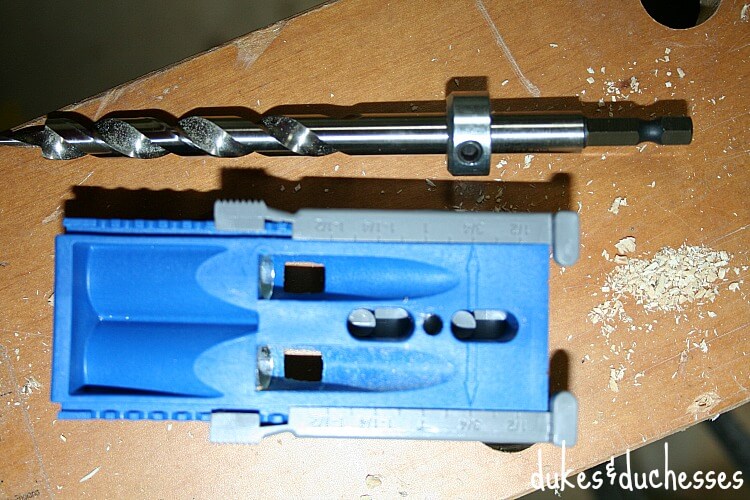
… and the Kreg Jig R3 clamps right onto the wood {I used a Face Clamp [affiliate link] to attach them}.  You’ll notice that the wood in this photo is not the wood I used in the final project but you can get an idea of how the Jig clamps onto the material {although with a piece of appropriate-sized wood, it will sit completely on top of the wood}.

kreg jig jr

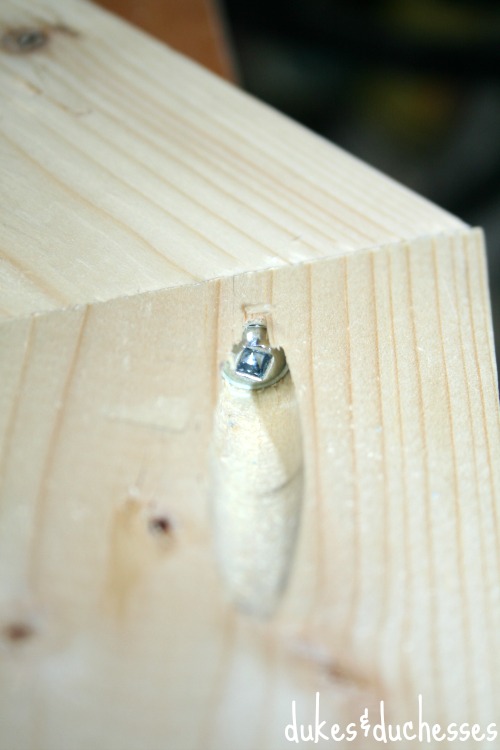
I drilled two pocket holes into the back of the wood pieces …

pocket holes

… and screwed the pocket-hole screws into place.  While screwing the pieces together, I clamped the two pieces onto my work bench, lining up the edges.  And ironically, the one corner that isn’t perfectly lined up is the one in this picture.  Well, there you go … who needs perfection, right?

screw in pocket hole

When all the pieces were screwed together, it formed a fun almost-hexagon {smile}.

hexagon pumpkin frame

I spray-painted it orange and distressed the edges slightly …

painted hexagon pumpkin

… then hot-glued a six inch copper pipe stem onto the top …

copper pipe stem for hexagon pumpkin

… and added a large burlap leaf …

burlap leaf on hexagon pumpkin

… and coiled vine wires.

copper wire on hexagon pumpkin

I really love the way this hexagon pumpkin looks and it adds a fun fall component to my mantel.

fall mantel with hexagon pumpkin

Since I don’t have a modern home, I softened the strong pattern by pairing it with some real pumpkins and my always-present-on-the-mantel vintage window.

a fall mantel with a hexagon pumpkin

I’m loving this fun new piece of fall decor and already planning the next project with my DIY Project Kit!

hexagon pumpkin for fall

more posts like this

For more DIY Halloween projects, be sure to check out this fun pumpkin cloche for fall entertaining …

pumpkin cloche

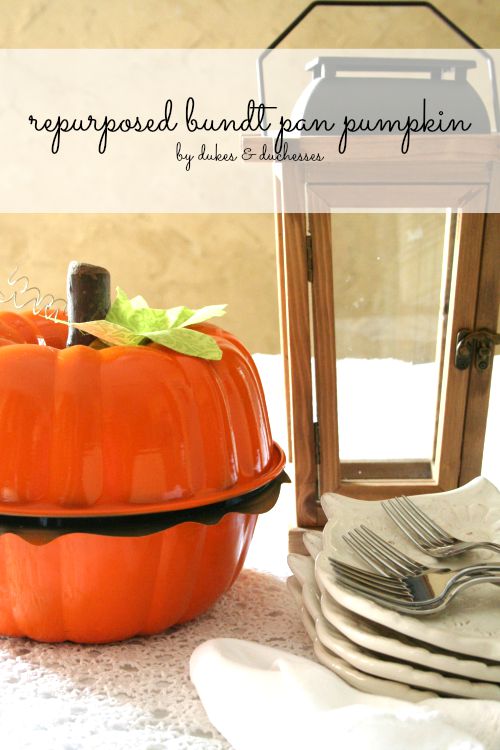
… thrifted bundt pans turned into a pumpkin …

repurposed bundt pan pumpkin

… and a monogrammed cross-stitch pumpkin!

monogrammed cross stitch pumpkin


8 Comments

About Randi Dukes

I’m Randi, a Dallas-based mom of five kids, ranging from third grade to college and including a set of twins. I love strong coffee, craft and DIY projects, my planner, and my big ol’ family. When I’m not creating something for my blog, I can be found in the car, running kids from one place to another. I’m the one knitting at the red light. Connect with me on google+ | twitter | facebook

« Decorating Tips from a Hotel Room
DIY Geometric Wall Inspiration »

Comments

  1. Ashley @ Cherished Bliss says

    October 22, 2014 at 8:17 pm

    Seriously adorable!!! I kinda have a love affair with wooden hexagons right now!! : )

    Reply
  2. Kadie says

    October 24, 2014 at 4:48 pm

    How cute! I love the shape! I gotta get me a Kreg Jig!!

    Reply
  3. Anna Moseley says

    October 25, 2014 at 11:35 am

    What a great addition to your fall matle decor! Love it!

    Reply
  4. Vanessa says

    October 27, 2014 at 9:06 am

    Randi that is so cute!! Love it!

    Reply
  5. Julie says

    September 18, 2016 at 3:01 pm

    This is so darling, Randi! Sharing on FB 🙂 Thanks for stopping by! ~ Julie

    Reply
  6. Suzie@Suziesview says

    September 22, 2016 at 9:12 pm

    Ok seriously that is the cutest pumpkin craft I have seen so far this season. I was happy to see it! Visiting from Funtastic Friday!

    Reply
  7. Angie @ ambient wares says

    September 28, 2016 at 5:57 pm

    This is so awesome! I just purchased a Kreg Jig mini and I’m in loooove with it and I’m definitely going to make this. I wanted to let you know I’ll be featuring you at this week’s Funtastic Friday party! Thanks for sharing 🙂 I hope you can stop by to grab a featured button

    Reply
  8. Victoria @DazzleWhileFrazzled says

    September 29, 2016 at 9:27 pm

    Love the shape and simplicity of this pumpkin. I’d have to have the husband do the woodworking for me but I could paint and decorate it like no other! 😉 Visiting from Funtastic Friday party.

    Reply

Leave a Reply Cancel reply

Your email address will not be published. Required fields are marked *

  • Facebook
  • Instagram
  • Pinterest
  • Twitter
  • YouTube

Welcome to Dukes & Duchesses!

dukes and duchesses profile photo

I’m Randi, a mom of five living in Dallas. I love strong coffee, long lists, bright colors, thrift stores, repurposed junk, and power tools.

how to plant a sweet tea garden

Southern Sweet Tea Container Garden

colorful wood DIY garden marker

DIY Wood Veneer Plant Markers

creative outdoor garden ideas

8 Creative Ideas for Your Outdoor Garden

DIY herb garden markers

DIY Upcycled Knife Garden Markers

upcycled cutting board sign in beverage garden

DIY Beverage or Cocktail Garden

Dukes and Duchesses is a participant in the Amazon Services LLC Associates Program, an affiliate advertising program designed to provide a means for sites to earn advertising fees by advertising and linking to Amazon.com.
Any content on this website is created for inspirational purposes only. You assume your own risk for using any methods, tools, or supplies suggested here. Follow proper guidelines for every tool or supply used and obtain professional guidance as needed.

Copyright © 2025 · Randi Dukes · Wordpress Hosting by SERVOUSLY