This is a sponsored conversation written by me on behalf of Cricut. The opinions and text are all mine. This post contains affiliate links.
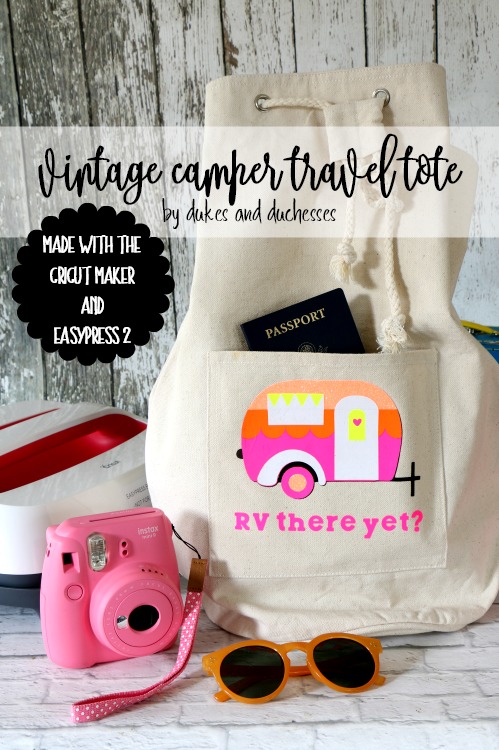
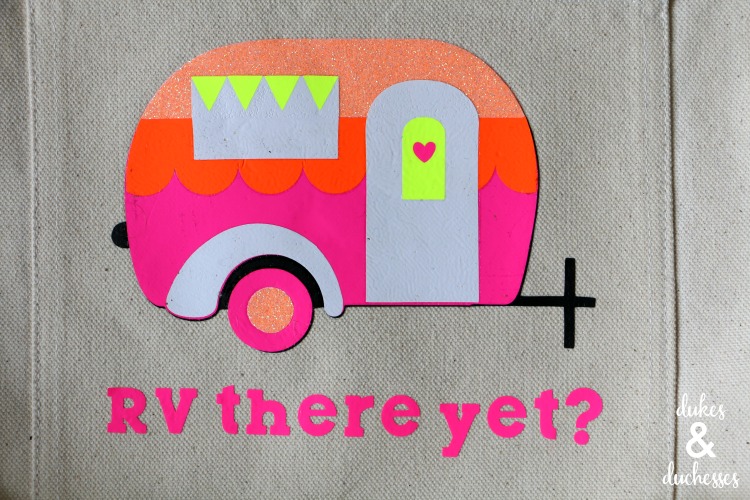
I have a huge love affair with vintage campers. The more glammed out, the better. It’s my dream to find one {super cheap, of course}, fix it up, and travel around. In my dream, I’m not pulling it behind my mini-van {smile} but in real life, I probably will be. And so be it. In the meantime, until my vintage camper dreams come true, I’m fueling my dream with some cute crafting, starting with this vintage camper travel tote made with the Cricut Maker and the new EasyPress 2. With layers of colorful iron-on and a tiny heart on the door, this easy-to-make travel tote is not only practical but super cute too!
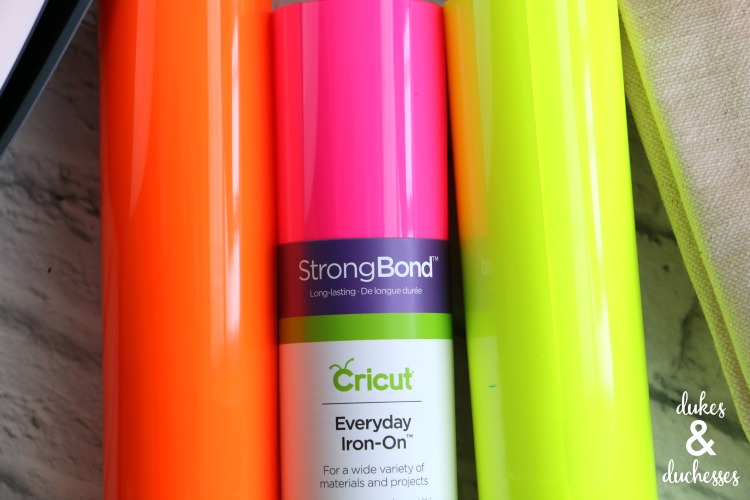
To make this travel tote, you’ll need a plain canvas tote bag {I found this cute design at my local craft store}, six colors of Cricut Iron-On {I used bright neon colors and a pretty glitter Iron-On as well}, a Cricut Maker for cutting the design, and the Cricut EasyPress 2 for applying the Iron-On to the bag.

I love both the colors and the quality of Cricut StrongBond™ Everyday Iron-On. I want my Iron-On material to stick after many, many washes and that’s of utmost importance to Cricut as well. The quality of Cricut Iron-On materials and the EasyPress are best in class. They now have a StrongBond™ guarantee on many of the Iron-On materials. Cricut’s StrongBond™ Guarantee means that when used as directed, you’ll be completely satisfied with the results or they’ll replace it for free. Look for the StrongBond™ Guarantee on the packaging.
When used as directed, Everyday, SportFlex, and Glitter Iron-On are designed to outlast 50+ wash and dry cycles!
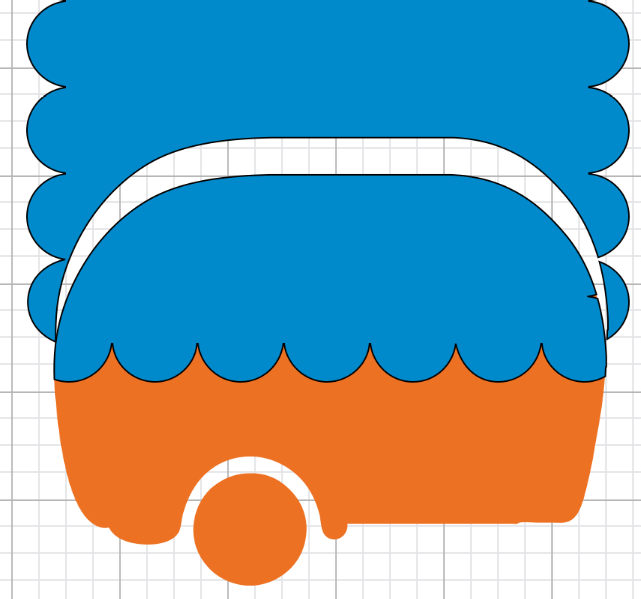
I designed the vintage camper pattern in Cricut Design Space. I started with a simple camper image, switched it to cut rather than print {you can do that by switching the little icon next to the image}, and added some fun elements of my own.
I wanted some colored layers on the camper and I wanted scallops along the edge of the layer. To create that look, I duplicated the camper to create a new layer. Then I added a scalloped frame image, filled in the center with a square and welded it together to create one solid object.

I placed the square over the layer …

… and used the slice tool to cut it then removed the extra pieces. That left me with a scalloped piece I could place over the main camper. I used the same idea but with a rectangle to make the top layer. The slice tool is one of my favorite features in Cricut Design Space because it gives you the ability to completely transform an image.
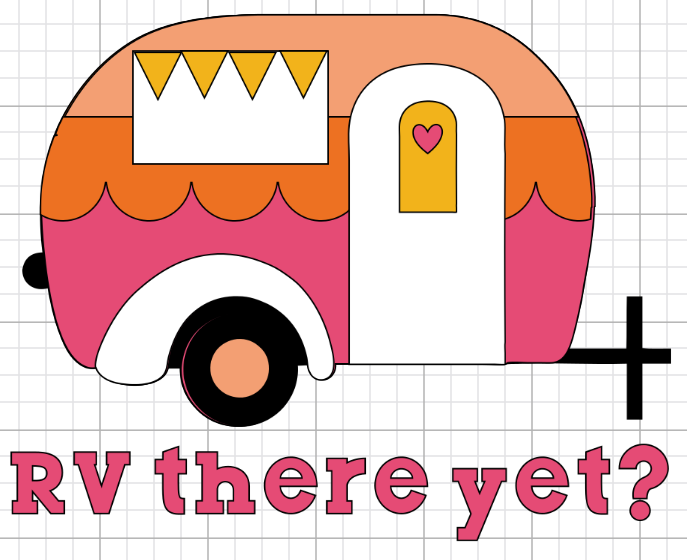
I added a banner to the window, a heart to the door, and a few other small features and I love the final outcome! So cute, right? If you love it too, you can use this design without having to recreate it. Simply click on this vintage camper link to go to Cricut Design Space and use my image!
Once the image was designed, I cut the pieces with my Cricut Maker. Don’t forget to mirror the images when you cut Iron-On and place the material shiny side down on the cutting mat.

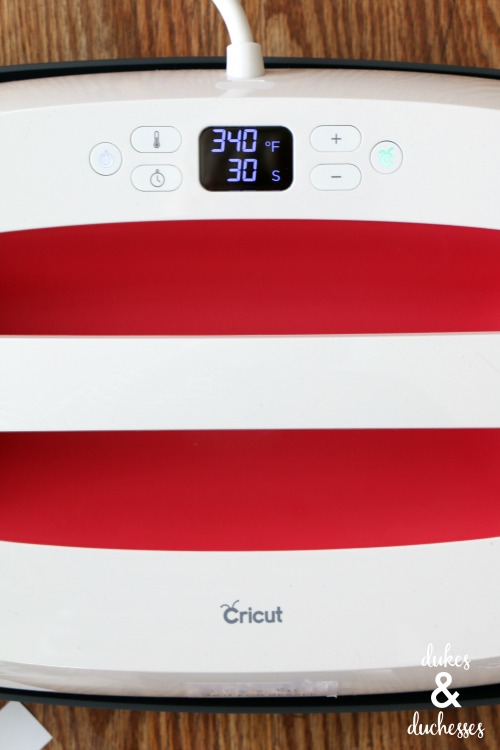
When all the pieces were cut, I preheated the Cricut EasyPress 2.
Cricut just released the new Cricut EasyPress 2 in a fabulous new raspberry color AND three different sizes: 6×7, 9×9, and 12×10! There’s a size to suit every project from small patches on clothing to large wall hangings.
I’m super excited about this because the EasyPress is hands-down one of my favorite products. I used to hate using Iron-On or heat transfer because I could never guarantee the results. An iron has an inconsistent temperature and I’d often have edges lifting after the first wash. With the EasyPress 2, those problems are gone! I get professional iron-on success in sixty seconds or less! The ceramic coated heat plate means dry, even heat for flawless transfers. There’s even a USB port for firmware updates.

The EasyPress 2 is easy to learn and simple to use. It can be set to a precise temperature of your choice up to 400 degrees {based on the product you’re using and the material you’re attaching it to} and the timer ensures you press for just the right amount of time. The time and temperature are both shown on the easy-to-read digital display.
To attach the design to the tote bag, I laid it flat on the EasyPress mat, preheated the spot with the EasyPress 2, and laid the first layer in place.
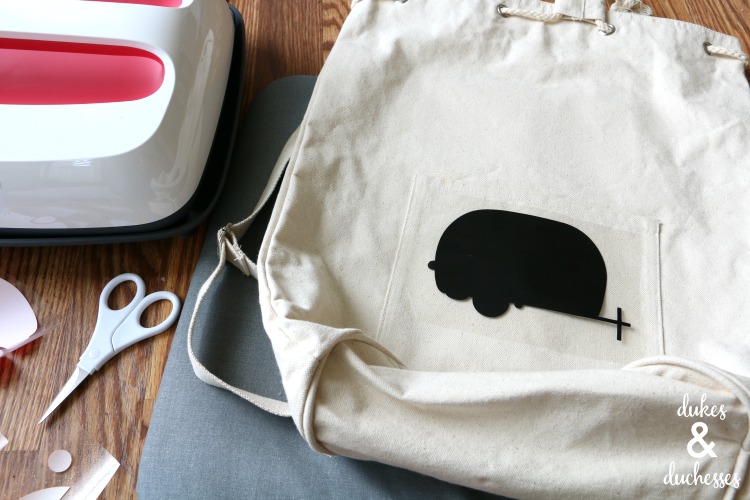
Because I was attaching different layers, I pressed the first layer with firm pressure for only a few seconds then hot peeled the backing off and prepared the next layer.
When you’re not using the EasyPress 2, it sits in an insulated, streamlined safety base that protects both the EasyPress 2 and your crafting surface.

I added each layer, pressing each for a few seconds {be sure to cover the exposed Iron-On with liner to protect it} …

… until all the layers were in place. I love the final result!
This little tote will make a great carry-on bag until I start traveling the country with my little glam vintage camper {wink}.

Do you have the Cricut EasyPress 2? What do you love about it?


Leave a Reply