This is a sponsored conversation written by me on behalf of Cricut. The opinions and text are all mine. This post contains affiliate links.
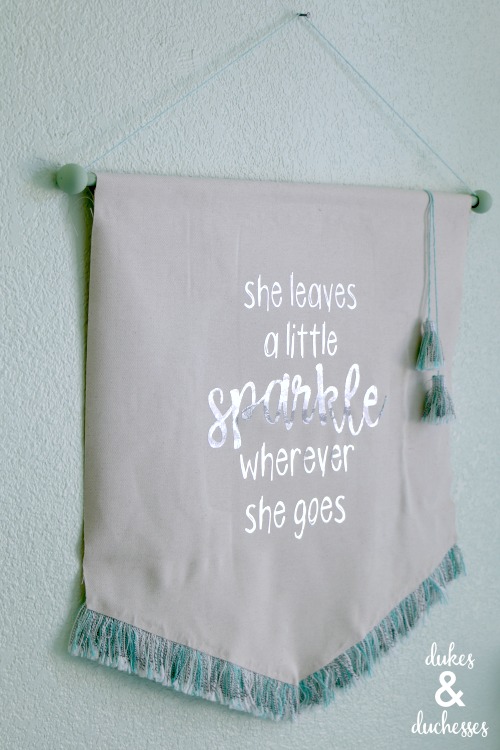
While i love all the bright colors, my youngest daughter loves mint. Her entire room is decked out in fairly muted mint so I couldn’t resist adding a sparkle wall hanging made with the new Cricut Wisteria Explore Air 2. My daughter is fiesty and full of life and really does leave a little sparkle behind her {and sometimes a few other things … wink} so this wall art seemed like the perfect fit!

To make this sparkle wall hanging, I used the new Wisteria Cricut Explore Air 2 bundle found exclusively at JOANN! When I opened the box {you can check it out in the highlights on my instagram profile}, my girls and I oohed and aahed over all the sparkle and shine! The color of the Explore Air 2 is gorgeous {does it make anyone else think of Pantone’s color of the year, Ultra Violet?} and the metallic shimmer Cricut Explore Air 2 is the first of its kind! The bundle is full of complementary products that make you want to get your craft on: a wisteria XL scraper and weeder, holographic sparkle iron on, five colors of Iron On, pink and silver foil embossed paper, and SportFlex Iron On. It’s a shimmery crafter’s paradise in one big box and it would make a pretty amazing Mother’s Day gift {you may want to share this post with your husband … wink}!
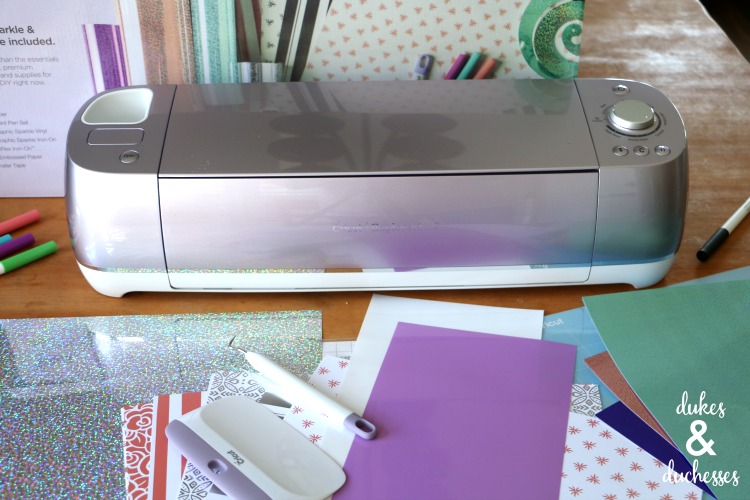
To create the wall hanging, I used silver holographic Iron On, the Wisteria Cricut Explore Air 2, canvas fabric, fusible interfacing, silver foil Iron On, cotton yarn, coordinating trim, a wooden dowel, large wooden beads, craft paint, and a glue gun. You can find all of these supplies at JOANN.

Because I didn’t want to sew this project at all, I adhered fusible stabilizer to the back of the canvas before I started the project. This should prevent the edges from fraying despite the fact that I didn’t finish them in any way.
Once that was done, I cut the fabric in a pendant shape, about 24 inches across and 24 inches in length. A ruler and rotary cutter makes this task easy.
I folded over about two inches at the top and hot glued it down along the edge to create a casing for the dowel.

I painted the wooden beads and the ends of the dowel that might show and set them aside to dry …

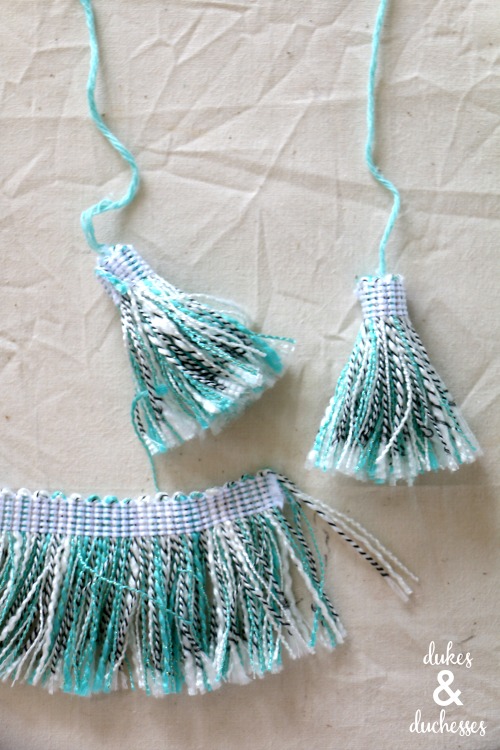
… then hot glued the trim along the bottom of the wall hanging and used leftover trim to create tassels, hot gluing a piece of yarn onto the top of the trim and then tightly rolling the trim until it created a tassel the size I wanted.
Then came the fun part: creating the image on Cricut Design Space. Rather than recreating the image, if you want to make your own sparkle wall hanging, you can use the project I created and cut it on your own Cricut! Simply click on the link to take you to the project.
Once created, I was ready to cut the imagine on the Cricut Explore Air 2. Like other Explore Air 2 machines, it can cut, write, and score in one step! The Smart Set Dial has predefined settings so you get the best results on any medium you’re cutting including paper, vinyl, iron-on, cardstock, fabric, poster board, and more. This gorgeous Wisteria Explore Air 2 can cut over a hundred materials!

You can upload your own images or choose from thousands of ready to make projects and images on Cricut Design Space.
The Wisteria Explore Air 2 connects with a USB or via Bluetooth with your laptop, desktop, or cell phone so you can create anywhere at any time!
I cut the Iron On {don’t forget to mirror it and place the Iron-On face down on the cutting mat} …

… then applied it with the new Cricut Wisteria EasyPress {I’ll share more about this awesome at-home heat press later this week}.
I set the time and temperature according to the guide {330 degrees for holographic Iron-On and 295 degrees for foil Iron-On}.

I preheated the fabric for five seconds then applied heat and pressure for 30 seconds on the front and 15 seconds on the back.

I worked in sections, applying the holographic Iron-On first {and adhering it in two separate presses} then applying the foil Iron-On.
When using different mediums, don’t forget to change the heat setting in between and pay attention to whether you need to do a warm peel or a cool peel to remove the backing.

To complete the wall hanging, I placed the dowel into the casing and hot glued the wooden beads on the ends, attaching the ends of yarn into the balls as well to create a hanger.

I attached the tassels as the final step {I simply hot glued the yarn onto the back} and hung it up in Tate’s room.
I love that the holographic Iron-On changes depending on where you’re standing in the room …

… and the foil reflects the colors around it.
Tate loves her new sparkle wall hanging and it adds a fun bit of personality to her room!

What would you make with the Wisteria Explore Air 2 bundle from JOANN?


What a great project idea – I really like it. The Cricut EasyPress is a wonderful heat press, I think it’s a great alternative to the traditional presses. I’ve also just ordered a ton of Cricut vinyls so I might give this project a go in the near future!
I love the shimmery metallic you used for Sparkle! What a cute wall hanging, that is a very cool Cricut project. Thank you for linking up with us at the #HomeMattersParty this week.
I love how your banner turned out. So pretty. Thanks for sharing at the Inspiration Spotlight party @DearCreatives Pinned & sharing. See you again soon.