These painting tips are sponsored by Purdy. All thoughts and opinions are my own.
I just finished painting another room in my house {I’ll share the full makeover soon} and while I’m no painting expert, over the years I’ve gleaned some painting tips that have made painting quicker and easier. Check out my painting process and then be sure to leave me a comment with your best painting tips!

Spend the money on good paint brushes and rollers.
I’m a total cheapskate and I’m always looking for a bargain. For years, I spent as little as possible on paint brushes and rollers, buying the cheapest available or grabbing them in bulk at ReStore. I was convinced that all brushes were the same. Not true. Once you’ve used good brushes and rollers like Purdy brand {affiliate link}, you’ll never go back. Good brushes and rollers hold more paint which ensures a smoother, more even finish with no shedding bristles or brush lint in the paint.

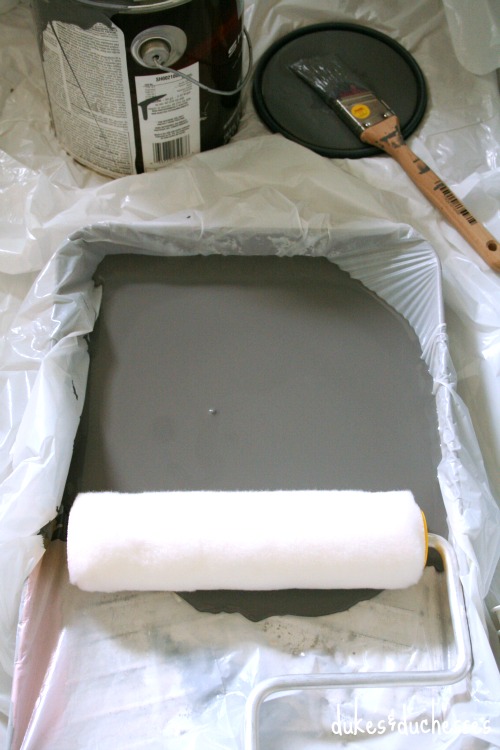
Use a garbage bag to line a metal paint pan for a super affordable, disposable liner.
Rather than paying for expensive paint pans or plastic paint pan liners, place a metal paint pan inside a large garbage bag and tuck the ends under the pan, squeezing out any air. Pour the paint over the bag and paint as you normally would then throw out the garbage bag with any extra paint tied inside. This idea costs mere cents and makes clean up a breeze.
Don’t skip the prep work.
Where clean lines are required {like doorways and baseboards}, tape edges. Remove switchplates and outlet covers. Fill any holes in the wall.
Do hard things first.
Paint a heavy coat around all doorways, ceiling edges, baseboards, and corners. If your first coat is thick enough, you can avoid doing a second coat on all these areas, just touching up where needed. These areas take the longest to paint so once they’re finished, the paint job will be smooth sailing.

Use an angled brush to cut in to create a straight line at the ceiling edge.
Cutting in is especially important when you have a textured {or hideous popcorn} ceiling that can’t be taped.

Popcorn ceilings make it nearly impossible to get a really straight line at the ceiling edge {since the edge isn’t actually straight} but cutting in with a well-loaded angled brush {affiliate link} will help you get a fairly even line. And if you don’t? Just do as I do and convince yourself that no one will ever look up that closely {wink}.

In addition to all the edges and the corners, be sure to also paint around nails or screws that are staying in the wall. That way you won’t have to try to roll close to the screw.

Use an extension pole instead of a ladder in a room of average height.
Ladders are tricky. You have to balance yourself along with your paint or you have to go up and down everytime you need to refill your roller. Plus, if you’re like me, you’re painting in a room where all the furniture has been pushed to the center, leaving very little room around the edges to maneuver a ladder.

Attaching an extension rod {affiliate link} to the roller allows you to easily paint the top of the wall without climbing a ladder or standing on a chair.

Prevent brushes and rollers from drying out in between coats.
You don’t have to rinse brushes in between coats. Simply place them in small sandwich or larger freezer bags, squeeze the air out, and let them sit until you’re ready for the next coat. I wouldn’t recommend leaving them for more than twenty-four hours but they should be fine within that time frame.
And finally …
Remove painter’s tape before the paint is fully dry.
Tape can sometimes cause paint to pull once it’s completely dry so I like to peel the tape off as soon as I finish my final coat of paint. If you have any spots that seem to be sealed with paint, use a craft knife to make a small line, allowing the tape to pull back.

There you go: painting tips from a non-professional! What are your best kept painting secrets?

For more painting tips, be sure to read about my yellow hallway and tips for getting solid paint coverage.


Good tips. Thank you.