Remember the thrift store challenge I told you about a couple of weeks ago? Today is the big reveal! I transformed some of my leather pieces into a project I love: two versions of a DIY rustic wooden tray with leather handles! Check out all the details of this Williams-Sonoma knock-off and then be sure to click on all the links at the end of the post to see the other thrift store transformations!

I was inspired by these gorgeous wooden trays from Williams-Sonoma and decided it would be really fun to use the leather pieces from the thrift store challenge to create my own version.

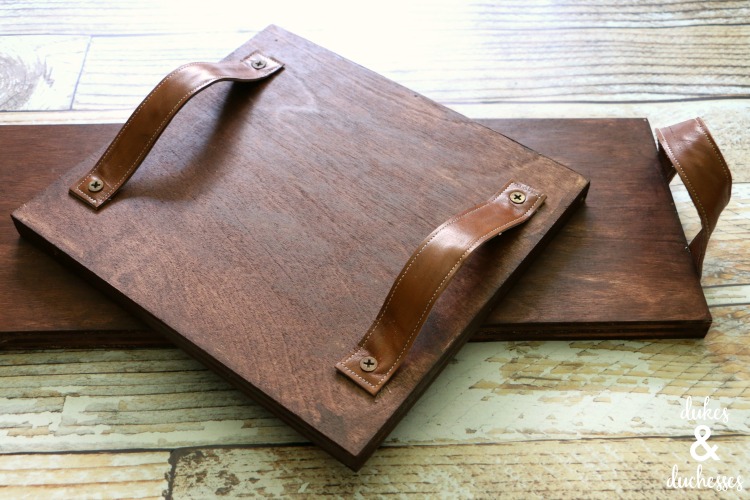
I started with my scraps of leather and rounded up a couple of pieces of scrap wood from my lumber bin.
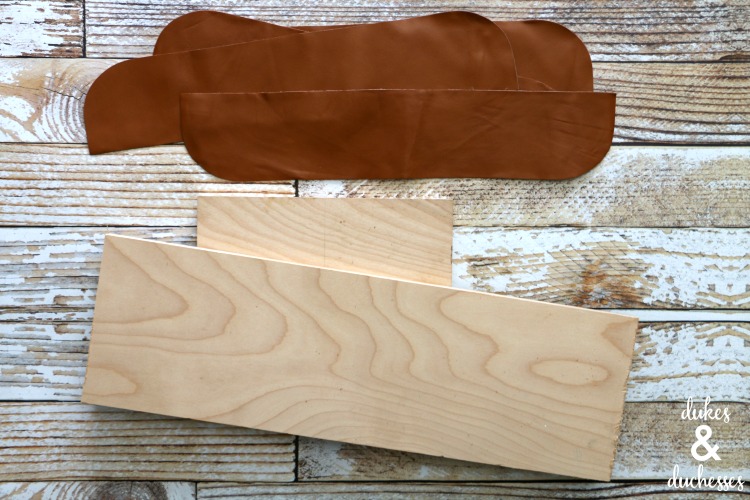
I sanded the wood with an electric sander to get rid of rough areas but didn’t worry about getting the edges perfect since I wanted a rustic look. Using Minwax stain cloths in dark mahogany {affiliate link}, I stained both boards. The small stain cloths are perfect for a job like this but be sure to wear gloves to keep your hands from getting stained as well.
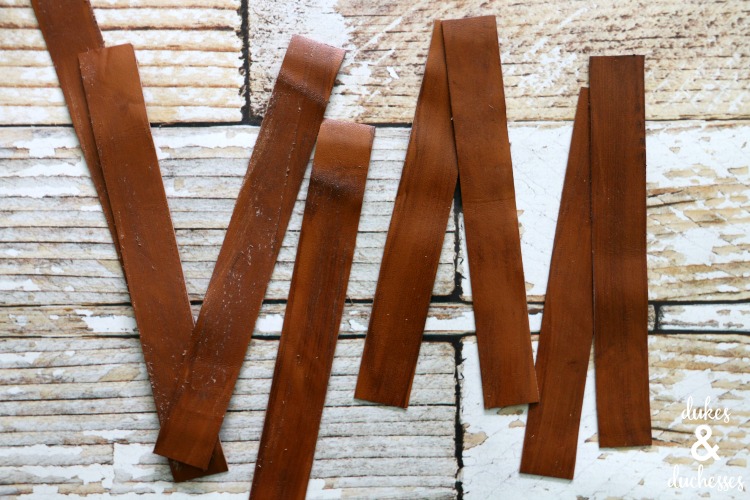
To make the leather handles, I trimmed the leather into strips, four pieces for each tray. I cut the strips one inch wide and about eight or nine inches long {the length will depend on the size of the wood being used}. I used a sanding block to rough the leather up a bit and wiped the pieces down with a stain cloth as well. The color was a bit too light for my liking and I wanted to give the leather a bit of an aged appearance.
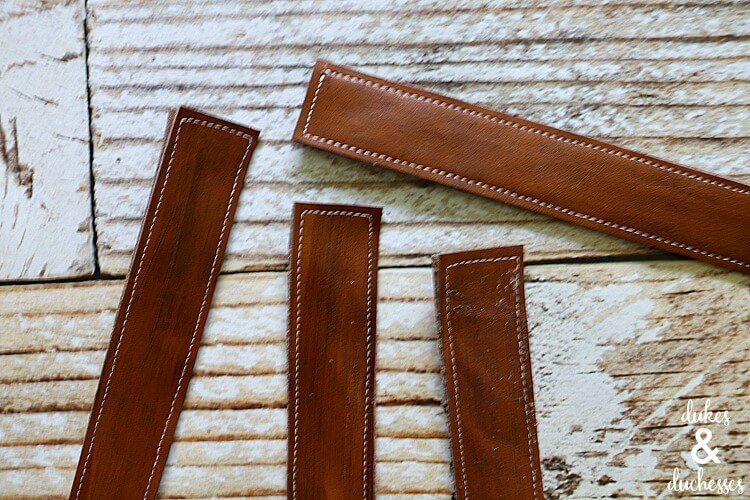
Once the stain had dried, I placed two pieces of leather, wrong sides together, and used my sewing machine to stitch around the edges. To keep the leather from sliding during sewing, I held it together with a tiny bit of hot glue down the middle of the strips. If you do that, be careful not to glue anywhere near where you plan to sew.
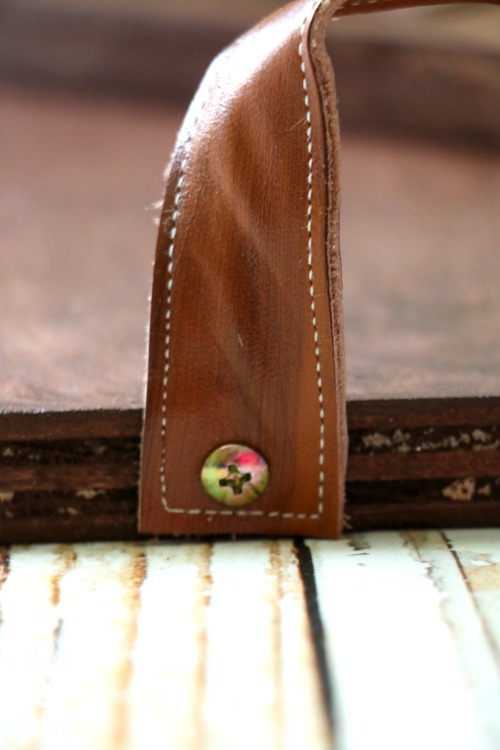
Hold the straps in place and drill a small pilot through the leather into the wood then attach the leather handles to the trays. I used bronze screws to match the aged appearance I was going for.
I attached the screws to the end of one of the trays and the top of another one to give them a bit of variety.
The trays turned out exactly as I had envisioned and I love them!
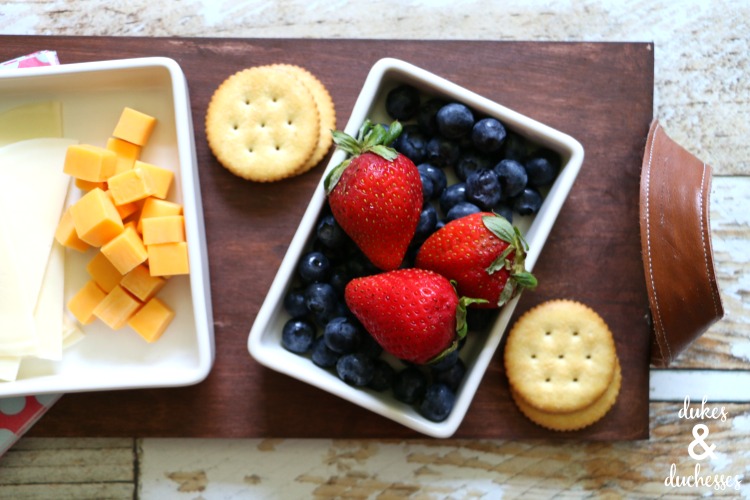
Since I didn’t use a food-safe finish on them, I won’t place food items directly on the trays but they’re perfect for an at-home date night …
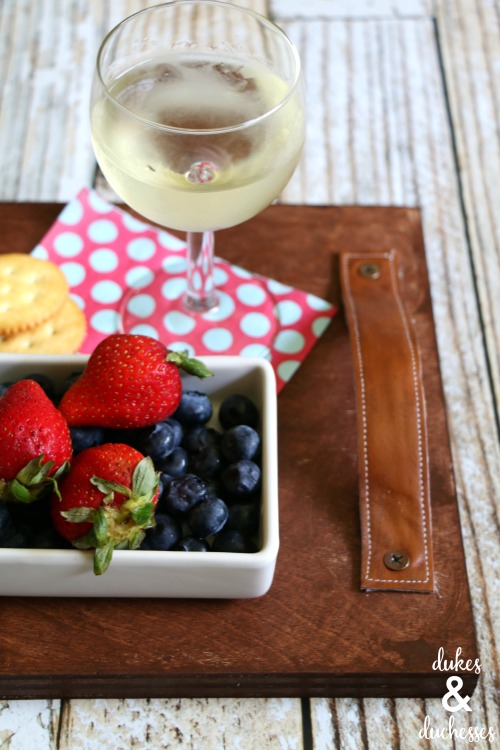
… or a quick happy hour.

Add your favorite treats and carry them to a sweet spot for two or set out a few of the trays to create a rustic tablescape.
And if you want some variety, instead of staining the trays, paint them in bold colors, use thicker wood, or use a different color of leather to create an entirely different look.

However you choose to create them, these trays are the perfect practical accessory for entertaining! How would you alter your wooden tray?

Pin this wooden tray tutorial and then check out the other trash to treasure projects from the thrift store challenge! Just click through on the links below!

Salvage Sister and Mister :: Chalkboard Divider and Numbered Sign
My Life From Home :: Sunglasses Holder, Hoop Art, and Wooden Paddle
Refurbish 360 Blog :: Mini Succulent Pots and Address Plaque
Rachel Teodoro :: Embroidery Hoop Chandelier
One Mile Home Style :: Accent Table
All Things New Again :: Wall Art, Cell Phone Charging Station, Toy Box, Ornaments
Shepherds and Chardonnay :: Bushel Basket Lampshade and Upcycled Tiered Tray
Farmhouse 40 :: Thrifted Vignette


Great job on the trays. My fav is the larger one with the handles on the sides. I didn’t realize you could sew leather on a home machine; love the stitching detail! Perfect for sunset cocktails on the deck!
What a great idea! Your trays are so cool. Thank you for the tutorial. I’m thinking you could do the same thing with an old leather belt. Have a great week! ~Courtney
BRAVO!!!!! I adore these trays!!!!
I absolutely love these trays. Great job
These look awesome, Randi! I’ll bet that you could sell them in a heart beat if you tried.
I’m in love! What a great makeover! The leather handles are perfect and the tray will be a real show stopper. well done!
Randi,
You did such a beautiful job with the leather bits! Incredible how classic and well made they turned out! You should be very proud! #Impressed !
Jeannee
Absolutely love those trays! Yours was one project I was anxious to see! I’m not sure that I could have been so creative! Way to go!
Don’t you just love it when you can recreate an expensive piece for pennies? Love your wooden trays! I’ve got a little bit of leather stashed away too. Thanks for the project inspiration!
That is a really fun use of the leather pieces. It looks so good. 🙂
These are absolutely fantastic! I have always wanted to do a project with leather, but wasn’t sure how to go about it. This is the perfect project. Great job on the challenge!
I love how these turned out!! Such an awesome idea, and an easy DIY!
I never heard of Minwax Wipes— what a genius product! Okay,…that takes staining to a whole new level. I’m always intimidated by staining. I love your tray. I would love to have one like that to serve on. I bet you could even use metal drawer handles for the handles if you didn’t have leather,…that would probably work too. I feel like I might have to make this! Thank you for the inspiration!
I am loving this idea! What a great way to amp up a simple bread and cheese board. I’d love it if you could share this with me and my co-hosts over at the Dishing It & Digging It Link Party, I think our followers would love it. It goes live at 4 pm est today.
If not, I am still glad I found your blog, going to go pop around some of your other posts! Have a great week!
Oh my goodness, Randi! As soon as I saw this I had to stop over. I love everything about these – such a perfect upcycle! Thanks for sharing at Project Inspire{d}.
Gorgeous serving trays! It’s amazing how simple the design it, but it looks so elegant. Great job!
What beautiful trays! I just love how simple and easy it looks to design.
What a great job! They look fantastic!
A very classy, rustic look to your trays, love it!
Love this DIY. It’s heading right onto my fall to do list. Thanks for sharing at the Inspiration Spotlight party. Pinned & shared.
I love this! It’s looks really easy too! I love easy projects!
Kate | The Organized Dream
I love those trays, they look so amazing. I can’t believe how easy you make these projects look like. Thank you so much for sharing Randi.
These wooden trays are just perfection! Thanks for sharing with us at Totally Terrific Tuesday! I have chosen this project to feature this week! Hope to see you back again for this week’s party!
This is such a cool project! I love how it turned out! Thanks so much for sharing it at my Creative Ways Link Party! Hope you’ll be back this week!
Blessings,
Nici
Oh my gosh these are gorgeous! And just think of all the money you’ve saved!! They turned out beautiful, I want one!! I wanted to pop by and let you know I’ll be featuring your GREAT project on #FoodieFriDIY today – come by and link up!!
Idea…Use old belts for the handle pieces. That way you do not have to glue or stitch. We used an old belt of my husbands and made pull handles for built in stair drawers on our “tiny” weekend house.
Worked great.
Wow! Wow! Wow! I love these. Gotta get off my butt and give this a try. Wow! Will be joining your site