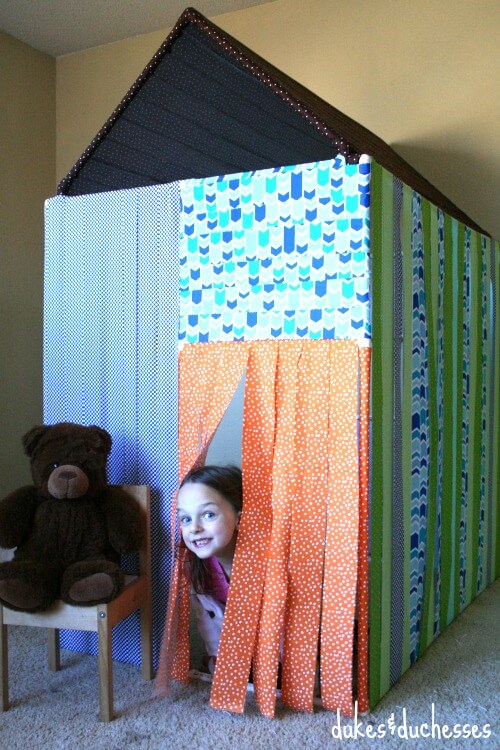
For Christmas, we gave Tate a playhouse. A storebought PVC playhouse. And it promptly ripped as we assembled it. While we packed it up to take back to the store, I decided I’d create my own PVC pipe playhouse for Tate. This tutorial is very simple and could probably use a bit of tweaking but I thought it might inspire you to create your own PVC pipe creation. And the best part of this playhouse? The fabric is all glued on in strips for a completely no-sew project.
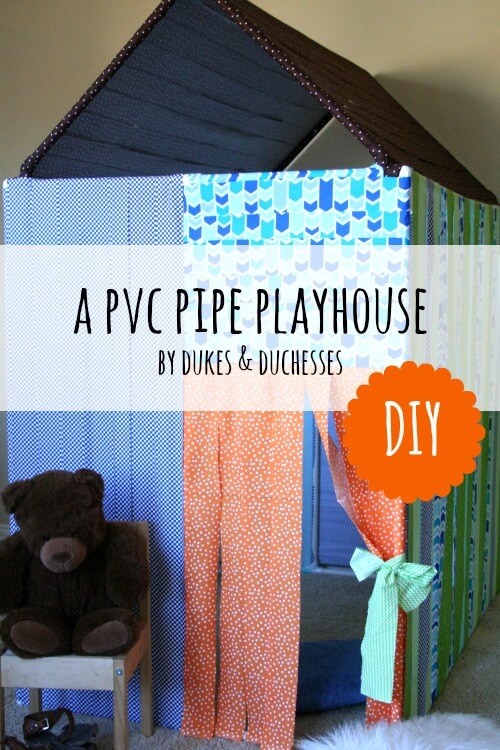
How to Make a PVC Pipe Playhouse with No-Sew Fabric Panel Sides
To make the PVC pipe playhouse, you’ll need 1/2 inch PVC pipe and fittings plus fabric in your choice of colors and a glue gun with lots of extra glue sticks.
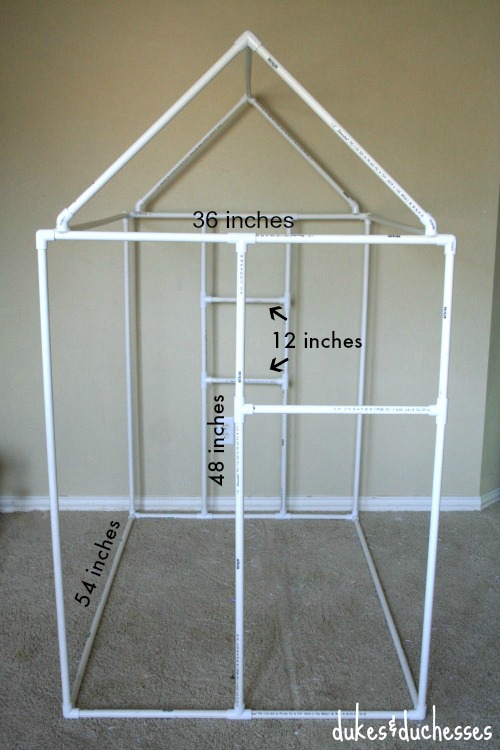
I actually had a garage full of PVC pipe and used what I had {which is why the roof sits the way it does instead of going straight to the corners} to make this a really affordable project. If you use the measurements shown below, the roof will go right to the corners of the house.

You’ll need the following PVC pipe and fittings:
- 8 pieces of 1/2 inch PVC pipe cut to 36 inches
- 7 pieces of 1/2 inch PVC pipe cut to 48 inches
- 5 pieces of 1/2 inch PVC pipe cut to 54 inches
- 2 pieces of 1/2 inch PVC pipe cut to 12 inches
- 10 1/2 inch three way elbows {affiliate link}
- 4 1/2 inch 45 degree elbows {affiliate link}
- 12 1/2 inch tee fittings {affiliate link}
Be sure none of the fittings are threaded.
Some of the initial pieces will be cut to fit the doorway and windows. For the doorway, cut two 36 inch pieces in half and cut an extra inch off each to accommodate the tee fitting.

Follow that same protocol to make the window {dividing the back piece into three and then eliminating an extra inch off the sides to accommodate the fitting}.
Repeat for the cross pieces on both the doorway and the window.
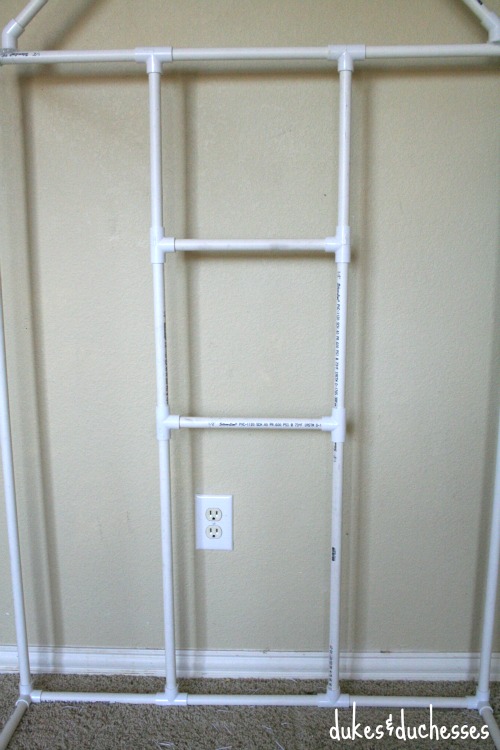
Attach tee fittings at all intersections and use a rubber mallet to make sure the pipe is inserted fully into the fitting.

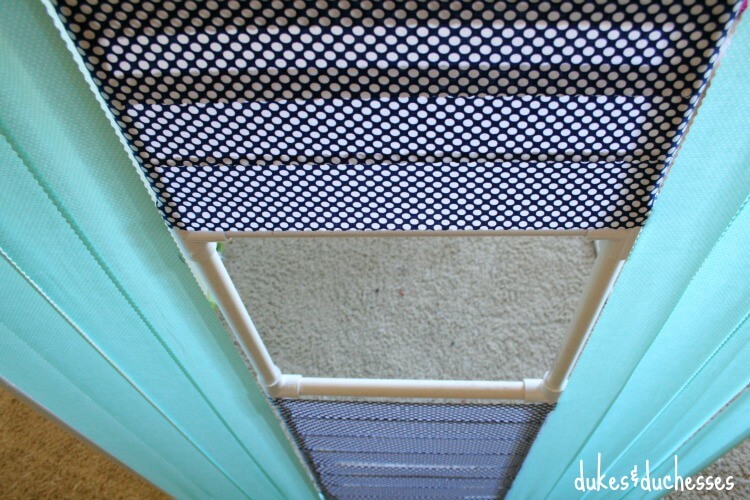
Use three way elbows to attach the corners of the playhouse, top and bottom …

… and to attach the top beam of the house. Attach the corners of the roof to the top of the house using 45 degree elbows and a lot of hot glue.

Once the cuts are made, the house is very quick to put together and then you just have to use fabric to cover it.
I cut strips of fabric using a ruler and a rotary cutter {with a pinking blade so the fabric won’t fray} and wrapped the ends around the PVC pipe and hot glued it in place.
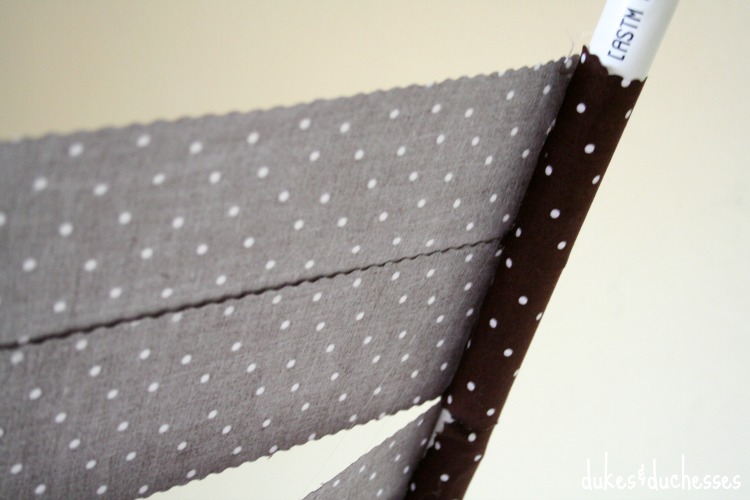
I used dabs of hot glue along the strips to keep them from gaping but didn’t fully glue them.

I repeated this technique to cover the whole house, using different colors and patterns on different panels, and wrapping the fabric in different directions.
I left the frame of the window bare so it had a window frame appearance …
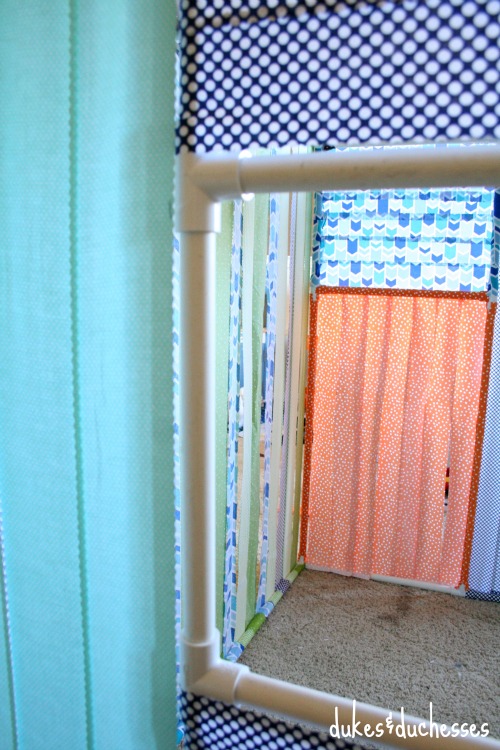
… but covered other pipes with fabric. There will be few bare pipes after wrapping in different directions but the playhouse looked more polished with those bare pipes covered.

To create the doorway, I used the same technique but didn’t attach the fabric to the bottom of the doorway …
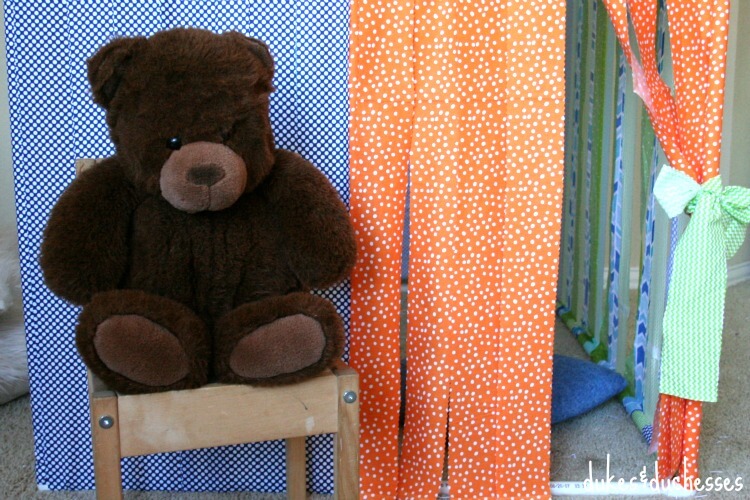
… allowing it to be pushed back to enter. The kids can tie it back if they want or let it hang down to provide a more private hideaway.

That’s all there is to it. From there, you can customize it as you want: a small chair or table inside, a few cushions to cuddle up and read, or maybe a drawing or two glued to the inside walls.
Make it suit your child’s personality or customize it to suit the room it’ll be in.
And if you make one, be sure to upload a photo to the Dukes and Duchesses facebook page so we all can see your creation!
Disclaimer: this is simply a playhouse and is not structurally sound. It should not be climbed on, sat on, or hung on.

For more PVC projects, be sure to check out my tutorial for making a shrimp slurp gun …

… and my PVC pipe advent calendar.


Great idea and great tutorial too! I love all the bright and colorful fabrics you used. Thanks for sharing!
What an adorable playhouse! My daughters would love this! Thanks for sharing.
Such a cute idea! Cutting the fabric into strips adds so much texture, too!
Oh my gosh Randi, you just gave me the biggest light bulb moment! We have a bunch of PVC Pipe leftover from a project and my daughter is getting married in August and we’re planning on making a Photo Booth.
This inspired me to reuse that PVC to build it!! Love this adorable playhouse and thank you so much for the light bulb moment!!!
I’m so glad it inspired you! I love the idea of a photo booth … can’t wait to see how it turns out!
Sending this ot my husband ASAP so he can make it for our son! He would LOVE this!!
Great idea. Looking at possibly making this soon and reusing some old sheets as the fabric.
I love this idea for my pre-k classroom! I am wondering, roughly how much did this cost you to make? I hope this is not too personal to ask!
I had some of the PVC pipe already in my garage stash and I also had all the fabric so I’m not entirely sure but I think it could easily be made for less than $50.
Just a suggestion on the playhouse, maybe can put velcro tape on the pipes and fabrics, this make the fabircs can firmly attached to the pipes and also allow you to change fabrics for washing or redesign purpose 🙂
Cheers,
Liew from Malaysia
Great idea!
This is awesome! Great step by step instructions! Doing this TODAY!!!