This DIY Homecoming mum tutorial was created as part of a sponsored post for OZARKA Brand. All thoughts and opinions are my own.
It’s Homecoming season in Texas which can only mean three things: Friday night lights, creative Homecoming proposals, and mums bigger than our state! If you’ve got high school students preparing for Homecoming, I’ve got a great tutorial to show you how simple it is to make a DIY Homecoming mum!

Homecoming mums in Texas vary greatly in size. This one is pretty average but they can be smaller or way, way bigger. It’s not uncommon to see mums that completely cover a girl’s body. Everything really is bigger in Texas {wink}.
To make a DIY Homecoming mum, you’ll need to stop at your local craft store. This time of year, craft stores in Texas have a large selection of mum-making materials. You’ll need round, decorative pieces to use for the top, lots of ribbons, both printed and plain, something to put in the center of the mum, and any personalized pieces that you want to add to your mum. When buying supplies, remember that the mum should represent the interests of the girl wearing it.
If your craft store doesn’t have an area dedicated to mum-making, wander the aisles and piece together craft items that can be repurposed into a mum.

How to Make a DIY Homecoming Mum
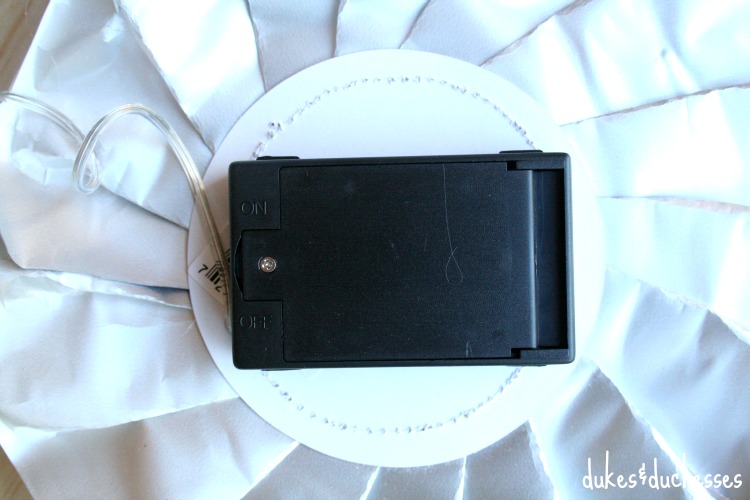
Start by creating the main body of the mum. I bought two different silver pieces, one ruffled and one fringed. Try to think about texture and a bit of a 3D effect when you’re choosing the pieces for the main body.
I glued lights {yes, lights!} around the ruffled piece of the mum, hot glued the fringed piece on top to cover the lights …

… and glued the battery pack onto the back. {The lights turn on and off with a simple switch on the battery pack.}
Now it’s time to embellish the front. Take two colors of ribbons in different widths, lay them on top of each other and cut to a length of about six inches, twist as shown in the photo below, and hold in place with hot glue.

Glue those pieces evenly in a circle on top of the mum …
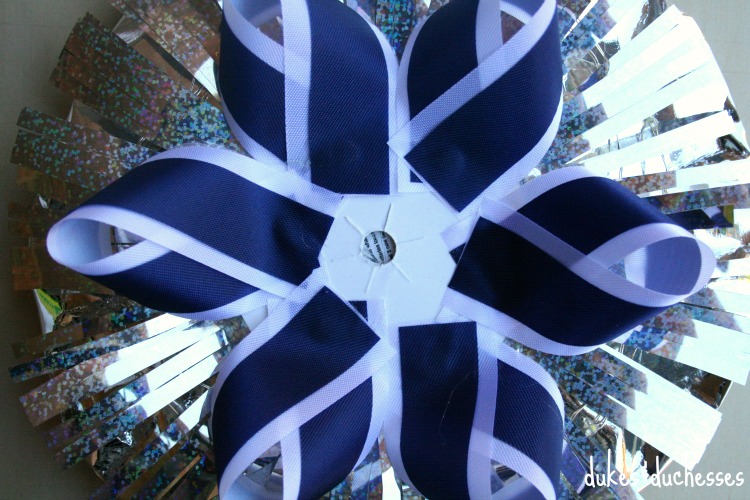
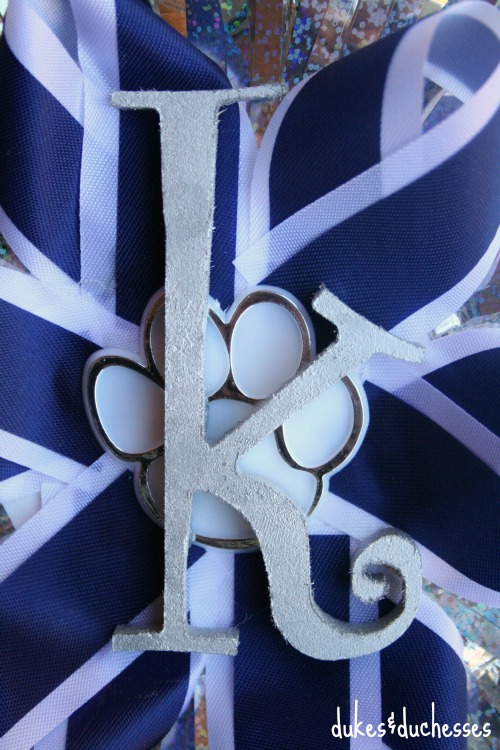
… then fill in the center with a personal touch. I glued a paw print to represent the school mascot and a large silver painted monogram for a classy touch. Other ideas include a teddy bear, a hat for a member of the drill team, a small ball to represent an athlete, or more decorative ribbon.
When the lights are turned on at the Homecoming dance, the silver will reflect the glow of the bulbs.

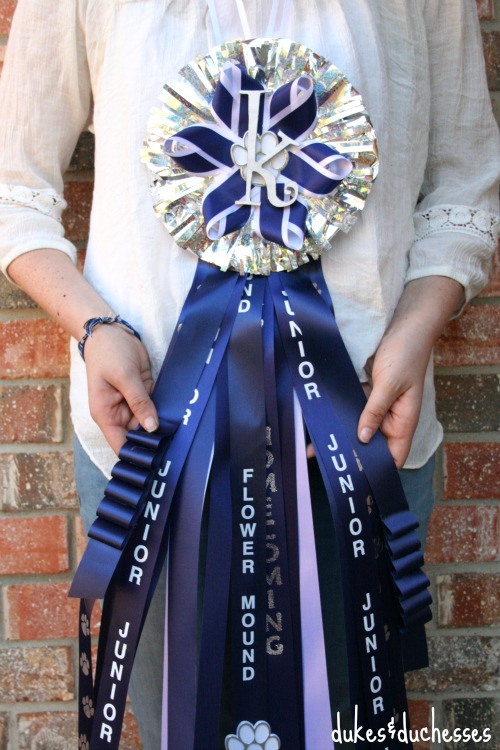
The next step is to add all the ribbons onto the mum. Choose a variety of ribbons in varying widths … in your school colors, of course. Begin by laying down the largest ribbons and adding others on top, alternating colors and widths, and staggering them so they’ll fill out the area you want. Hot glue the ribbons together as you go.

When you have a base, add in personalized ribbons. These fun ribbons can represent your student’s year, the school, the mascot, different extracurricular interests, and anything else that shows the personality of the student.

To add a little texture, pleat or fold some ribbons {hot glue the folds in place} or braid and weave ribbons {the craft store often has some braided ribbons and you can find tutorials online}.

Add a bit of whimsy, attaching other items to the ribbons, like a state shape or a mascot emblem.

When the ribbons are all in place and glued to each other, hot glue the entire thing onto the back of the homecoming mum, making sure they hang properly in the center.

Not hard at all, right? Mums are actually so fun to make and super simple … and they’ll be such a fun keepsake from the high school years.
Just like Homecoming plays a huge part in the high school experience, OZARKA Brand 100% Natural Spring Water has always played an integral role in the fabric of Texas communities. With more than 100 years of Texas heritage, OZARKA Brand knows we love our Texas high school football and celebrates community pride, tailgating, and Homecoming. For the second consecutive year, OZARKA is proud to support the Southlake Carroll High School football program as the official spring water of Dragon Stadium. OZARKA is sourced only from carefully selected springs in Texas and contains naturally occurring minerals for a refreshing, crisp, clean taste. Keep cheering for your team and quench your thirst with OZARKA!
Be sure to follow OZARKA on instagram, facebook, and twitter!
Do you celebrate Homecoming? What’s your favorite Homecoming memory or tradition?

For more school related ideas, be sure to check out tips for decorating a locker …

… a monogrammed duct tape messenger bag …

… and DIY personalized pencils.


I’d never even heard of these until I saw an article on Facebook a week or so ago. We don’t do anything like that in MD. What a neat tradition!