• Home
  • Start Here
    • About Dukes and Duchesses
    • Collaborate/Contact
    • Privacy Policy
  • Holidays
    • New Year’s Eve/Day
    • Valentine’s Day
    • leap year
    • St. Patrick’s Day
    • April Fool’s Day
    • Easter
    • May Day
    • cinco de mayo
    • Mother’s Day
    • Father’s Day
    • Fourth of July
    • Halloween/Harvest
    • Thanksgiving
    • Christmas
  • Crafts
    • general crafts
    • Cricut projects
    • printables
    • painting
    • sewing
    • knitting
  • DIY
  • Repurposed
  • Parties
    • Birthday
    • Entertaining
  • Recipes
  • Home Decor
    • Decor
    • home improvement
    • plants and garden
    • housekeeping
    • organization
  • travel
    • general travel
    • Dallas

Dukes and Duchesses

Dallas Fort Worth Creative Lifestyle Blogger

Christmas creative projects · Written by Randi Dukes

Cross-Stitch Wood Sign

686 shares
  • Tweet24
  • Share156

I haven’t done any Christmas decorating yet {I really prefer to enjoy Thanksgiving first} but I have been working on some projects for the Christmas season.  This cross-stitch wood sign was so fun to make and I love the way it turned out.  It’ll be a fun touch of handmade in our Christmas decor!

cross stitch wood sign

To make one, you’ll need a sheet of 1/4 inch thick plywood or another suitable board.  The sign can be any size you want since you’ll make your own letter templates.

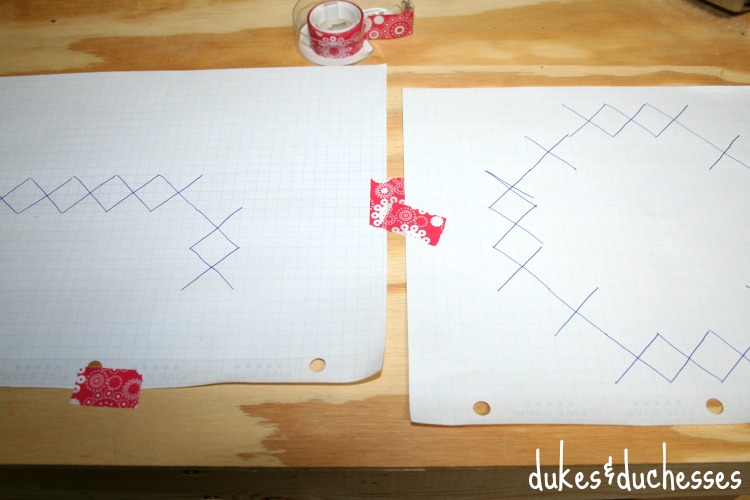
Go online and find cross-stitch alphabet templates then transfer each letter to a piece of graph paper.  To get the size I wanted, each of my X’s are four squares wide and four squares high on the graph paper.

Tape the pieces of graph paper onto the board, lining them up with the center and leaving equal space between them.

graph paper templates for cross-stitch wood sign

Drill through the endpoints of each X.  I used a drill bit that was about 1/4 inch in diameter.  The hole size will be determined by the needle you use {I used a large plastic tapestry needle} and the yarn you use {I used a thick red chenille}.  If you’re unsure, test a few different sizes on a scrap piece of wood.

When the holes are drilled, sand the piece of wood and spray paint it in the desired color.  I painted my board white and then used a sanding sponge to rough up the edges a little.

drilled holes in cross stitch wood sign

To begin stitching the wood, use hot glue to attach the yarn to the back of the sign …

end of yarn on back side

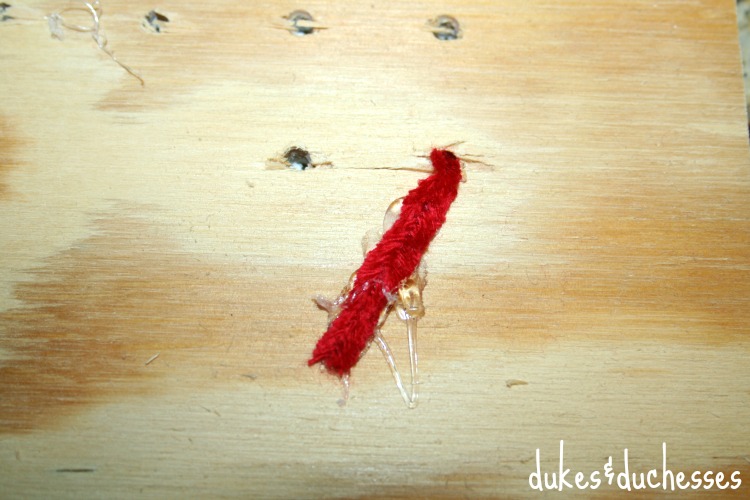
… and create X’s to match your template.  As with regular cross-stitch, you’ll want all your stitches going the same direction to give the best final outcome.

stitching the wood sign

If you need a new piece of yarn, hot glue the end of the last piece to the back of the board and begin again until the letters are all completed.

cross stitched letter on wood sign

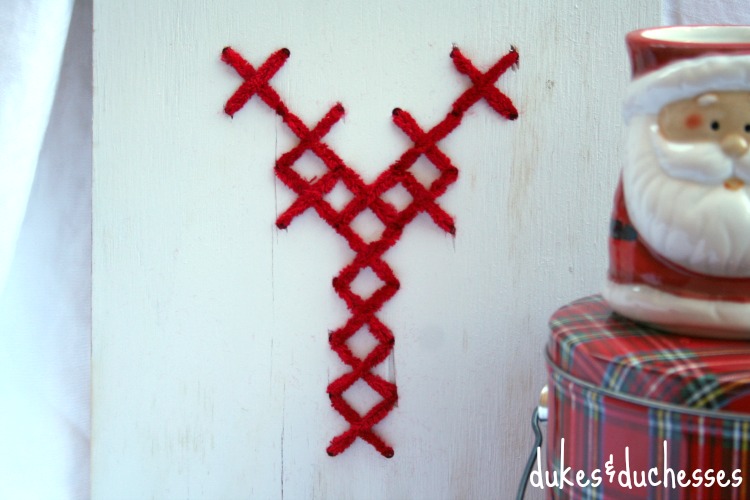
I love the look of the soft yarn against the rustic wood and the old-fashioned look of the stitching.  I’m looking forward to adding some more homemade decor to our home this holiday season!

cross stitched wood sign


7 Comments

About Randi Dukes

I’m Randi, a Dallas-based mom of five kids, ranging from third grade to college and including a set of twins. I love strong coffee, craft and DIY projects, my planner, and my big ol’ family. When I’m not creating something for my blog, I can be found in the car, running kids from one place to another. I’m the one knitting at the red light. Connect with me on google+ | twitter | facebook

« Eggnog Bread {for the Bread Machine}
Snowman Mason Jar Hot Cocoa Gift »

Comments

  1. Laura @ Housewife Hellraiser says

    November 24, 2014 at 11:15 am

    That turned out so cute. I’m like you, I don’t want to decorate until Thanksgiving is over! It’s still November! Still…I’m excited this year!

    Reply
  2. Megan @ Our Pinteresting Family says

    November 24, 2014 at 2:07 pm

    So beautiful!

    Reply
  3. keri @ shaken together says

    November 24, 2014 at 8:00 pm

    This could not be cuter! LOVE the pop of red against the white – my mom used to cross stitch, so this brings back so many good memories!

    Reply
  4. Carissa says

    December 9, 2014 at 2:20 pm

    So tricky! I honestly wouldn’t have thought to use wood as a crosstitch medium! Love! I’d love you to share at my link party

    Reply
  5. Linda says

    December 31, 2014 at 8:00 pm

    Somehow I missed this one the first time, so glad you posted it in your favorites. I’m totally doing this!

    Reply
  6. Dorci says

    November 7, 2016 at 2:17 pm

    Love this project! Could you let me know the size of your piece of wood?
    Thanks!

    Reply
    • Randi Dukes says

      November 8, 2016 at 9:58 am

      Sure, it’s about 16-18 inches wide and about 4 feet tall.

      Reply

Leave a Reply Cancel reply

Your email address will not be published. Required fields are marked *

  • Facebook
  • Instagram
  • Pinterest
  • Twitter
  • YouTube

Welcome to Dukes & Duchesses!

dukes and duchesses profile photo

I’m Randi, a mom of five living in Dallas. I love strong coffee, long lists, bright colors, thrift stores, repurposed junk, and power tools.

how to plant a sweet tea garden

Southern Sweet Tea Container Garden

colorful wood DIY garden marker

DIY Wood Veneer Plant Markers

creative outdoor garden ideas

8 Creative Ideas for Your Outdoor Garden

DIY herb garden markers

DIY Upcycled Knife Garden Markers

upcycled cutting board sign in beverage garden

DIY Beverage or Cocktail Garden

Dukes and Duchesses is a participant in the Amazon Services LLC Associates Program, an affiliate advertising program designed to provide a means for sites to earn advertising fees by advertising and linking to Amazon.com.
Any content on this website is created for inspirational purposes only. You assume your own risk for using any methods, tools, or supplies suggested here. Follow proper guidelines for every tool or supply used and obtain professional guidance as needed.

Copyright © 2025 · Randi Dukes · Wordpress Hosting by SERVOUSLY

Copyright © 2025 · Divine Theme on Genesis Framework · WordPress · Log in