• Home
  • Start Here
    • About Dukes and Duchesses
    • Dukes and Duchesses Creative Holiday Gift Guide
    • Collaborate/Contact
    • Privacy Policy
  • Holidays
    • New Year’s Eve/Day
    • Valentine’s Day
    • leap year
    • St. Patrick’s Day
    • April Fool’s Day
    • Easter
    • May Day
    • cinco de mayo
    • Mother’s Day
    • Father’s Day
    • Fourth of July
    • Halloween/Harvest
    • Thanksgiving
    • Christmas
  • Crafts
    • general crafts
    • Cricut projects
    • printables
    • painting
    • sewing
    • knitting
  • DIY
  • Repurposed
  • Parties
    • Birthday
    • Entertaining
  • Recipes
  • Home Decor
    • Decor
    • home improvement
    • plants and garden
    • housekeeping
    • organization
  • travel
    • general travel
    • Dallas

Dukes and Duchesses

Dallas Fort Worth Creative Lifestyle Blogger

building · Written by Randi Dukes

One Board Project :: Doll House Shelf

510 shares
  • Tweet211
  • Share45

The room my girls share has a cute {and super simple} new DIY project made from only one board: a doll house shelf!  It adds sweet little bedside storage for a small clock and a few treasures and is a whimsical touch in their pink girly room!

one board doll house shelf

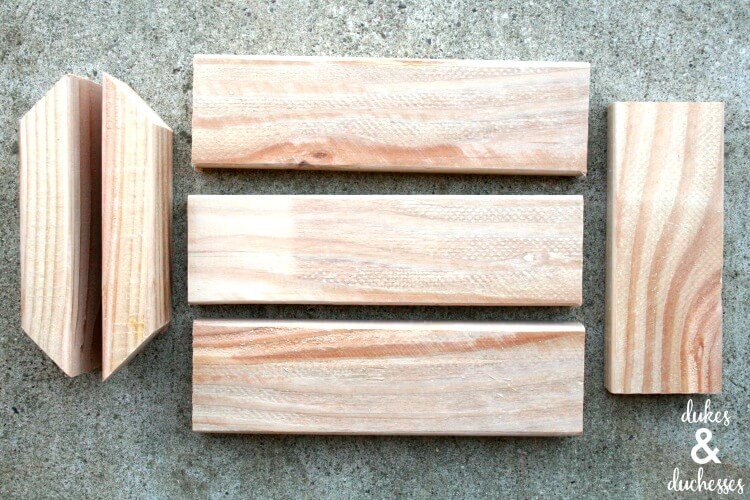
To make a doll house shelf like this one, you’ll need a 2×4 at least six feet in length.  Cut three 12 inch pieces, one 9 inch piece, and two pieces with 45 degree angle cuts on each end measuring 9 inches on the long side.  You’ll also need a brad nailer and wood screws.

cut board for doll house shelf

Place two 12 inch pieces on another 12 inch piece as seen in the photo below and screw them together from the bottom, making sure they sit square.

bottom of dollhouse shelf

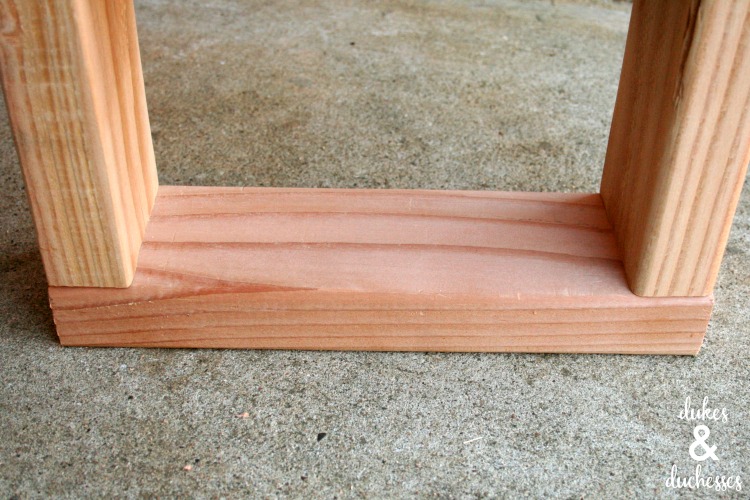
Attach the 9 inch piece halfway up the frame, attaching it with screws from either side.  {A tip: the easiest way to get the shelf even on both sides is to use another piece of wood as a spacer.  Place it between the bottom board and the shelf, screw the board into place, then remove the spacer.}

shelf on dollhouse shelf

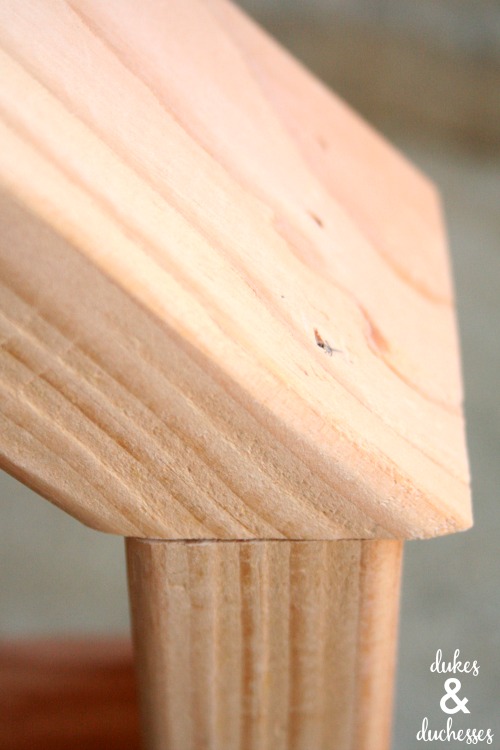
To form the top, place two angled boards together so they form the peak of the house and use a brad nailer to attach the pieces together.

top of dollhouse shelf

Set the top onto the frame, centering it, and nail it into place.

sides of dollhouse shelf

Simple as can be, right?  This is a great DIY project for a beginner or for someone with limited building experience {hand raised}.

frame of dollhouse shelf

Spray it with your favorite paint color, add a picture hanger to the back, and attach it to the wall with a screw and anchor.

dollhouse shelf on wall

It’s whimsical {which is code for imperfect – wink} but my daughter loves having a bedside spot for some of her special things …

dollhouse shelf for room

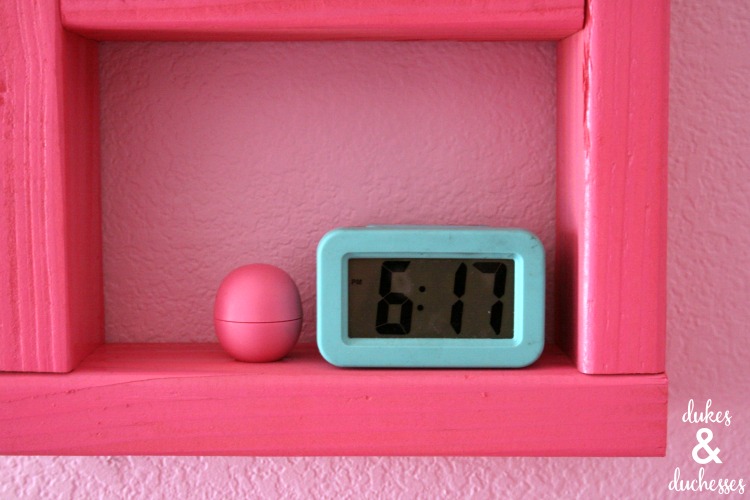
… and it really does add a sweet touch to the room.

DIY dollhouse shelf

Ready for some more one-board project inspiration?  Check out these other 2×4 projects from some of your favorite bloggers!


6 Comments

About Randi Dukes

I’m Randi, a Dallas-based mom of five kids, ranging from third grade to college and including a set of twins. I love strong coffee, craft and DIY projects, my planner, and my big ol’ family. When I’m not creating something for my blog, I can be found in the car, running kids from one place to another. I’m the one knitting at the red light. Connect with me on google+ | twitter | facebook

« How to Create a Color Washed Effect on Wood
Wrapping Up February »

Comments

  1. Sara says

    March 1, 2016 at 6:24 pm

    That is the sweetest little thing ever! So perfect for her little alarm clock and chapstick!

    Reply
  2. Funky Junk Interiors says

    March 2, 2016 at 12:06 am

    How adorable, Randi! A cute dollhouse on a wall I say! 🙂

    Reply
  3. Teresa says

    March 8, 2016 at 11:15 am

    So cute! I love it!

    If you have time, come and share this post over at the Really Crafty link party that is live right now!

    Reply
  4. Jessica says

    March 10, 2016 at 6:18 am

    Thats so cute! My girls would LOVE it!

    Reply
  5. creativejewishmom/sara says

    November 10, 2016 at 11:29 pm

    Love this, now just need some tools, sigh! Would love it if you’d join my very international linky party, craft schooling Sunday (opens on Saturday morning for you, which is Saturday night for me in Israel) always looking for some new contributors! hope to see you there!

    Reply
  6. Vera Karimova says

    August 7, 2020 at 11:11 am

    This is very cute! Did you use some tool for the 45 degree cut?

    I’ve been fooling around with this idea forever 🙂 should finally do it, maybe just a little smaller. I love making things for playroom!

    Thanks for the post, Randi.

    Reply

Leave a Reply Cancel reply

Your email address will not be published. Required fields are marked *

  • Facebook
  • Instagram
  • Pinterest
  • Twitter
  • YouTube

Welcome to Dukes & Duchesses!

Square profile photo

I’m Randi, a mom of five living in Dallas. I love strong coffee, long lists, bright colors, thrift stores, repurposed junk, and power tools.

Want to collaborate?

Click Here!

teeth brushing chart

Vinyl Teeth Brushing Mirror Chart for Kids

colorful fabric sign for thanksgiving

Happy Thankstuffing Fabric Sign Made with the Cricut Maker

customized DIY cloth napkins

Custom Cloth Napkins Made with the Cricut EasyPress

how to cut aluminum cans with cricut explore air 2

Upcycled Fall Wreath Made with Aluminum Cans

DIY monogrammed stockings

Monogrammed Placemat Stockings Made with the Cricut Explore Air 2

Dukes and Duchesses is a participant in the Amazon Services LLC Associates Program, an affiliate advertising program designed to provide a means for sites to earn advertising fees by advertising and linking to Amazon.com.
Any content on this website is created for inspirational purposes only. You assume your own risk for using any methods, tools, or supplies suggested here. Follow proper guidelines for every tool or supply used and obtain professional guidance as needed.

Copyright © 2022 · Randi Dukes · Wordpress Hosting by SERVOUSLY

Copyright © 2022 · Divine Theme on Genesis Framework · WordPress · Log in