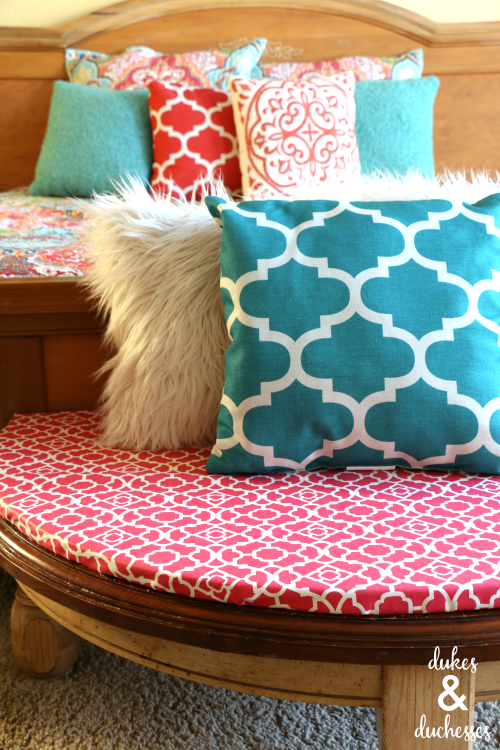
Did you see my colorful bedroom makeover? I made a couple of fun DIY projects to add some character to the room and this DIY repurposed bench is one of them. This rounded bench is made from my old kitchen table! It sounds a bit complicated but is actually such an easy project. Scour garage sales or your local resale shop for an old table with four legs and make your own upcycled bench!

To make this DIY repurposed bench, you’ll need a round wooden table. Don’t choose something too large. A table that seats four is just right but you could even go a little smaller.

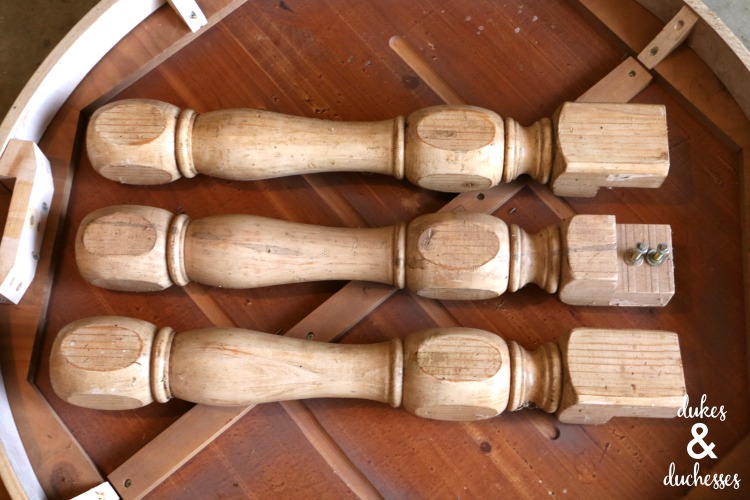
Be sure the table has four separate legs. This tutorial won’t work with a pedestal style table. You’ll only use three of the legs so save the other one for another upcycled project.
While preparing the cut, place one leg directly in the front center of the bench with two other legs on either side. You’ll cut right behind the back two legs, just past the center point of the table. Mark your cutting line with a pencil, a piece of tape, or a wood guide. I opted to use masking tape to mark mine so I could cut right alongside it.
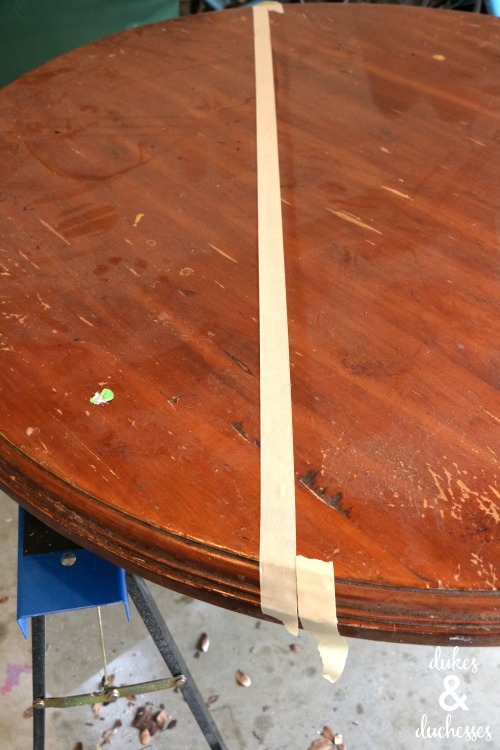
Before cutting, look on the bottom of the table to see what the saw will go through. I had to remove one screw and a few staples from the underside of my table before cutting.
Use a circular saw set to the appropriate depth to cut across the table then sand any rough or uneven edges. Be sure to wear the appropriate safety gear, including safety glasses!
Cut the legs down to the appropriate length. A bench typically sits at a height of 17-19 inches but I cut mine just a tad bit shorter so I could cut it directly along one of the lines on the legs. It seemed like an easy way to ensure I cut all the legs evenly and an inch or so in height won’t make any difference on this style of bench.
Once the legs are cut to size, reattach them to the bench.

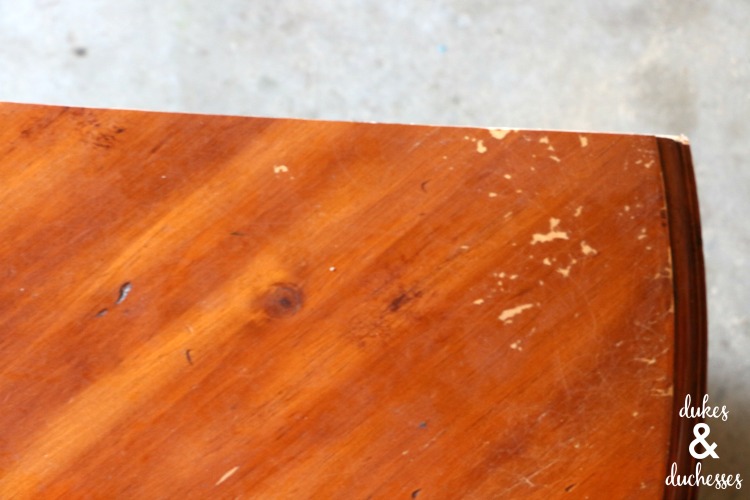
Sand away any imperfections and paint the bench if desired. I opted to leave my bench as is since I really like the two-tone wood and thought it would look good with the other wood furniture in my room.
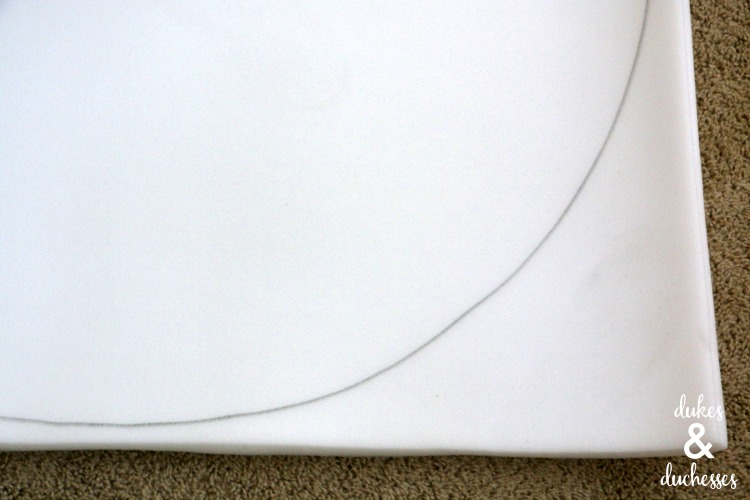
To make the cushion for the top of the bench, you’ll need foam in your desired thickness and heavy decorator fabric. I opted to use one inch thick foam because my table has a routed edge and I didn’t think it would look good to have that angled edge and then have a tall cushion butting against it.
To cut the foam, lay the bench upside down and trace around the bench top onto the foam. If your bench also has a routed edge, trace the bench at the innermost edge.

Lift the bench off then use scissors to cut the foam along the size.
Lay the cut piece of foam on top of the fabric and fold it around, hot gluing the fabric into place. Try to avoid large wrinkles.
Depending how heavy and thick your foam is, you can simply set it on top of the bench {like I did with this window seat bench} or attach it with glue. If you want, you can add tufting with fabric covered buttons and drilled holes in the bench or just leave it plain like I did.

This repurposed bench is just perfect for the end of the bed. It adds a fun pop of color and whimsy and is perfect for sitting down to put on socks or shoes. The kids have already adopted it as a place to sit and chat with me while I’m working on my laptop and I love that!
Would you cut up a kitchen table and turn it into a bench?

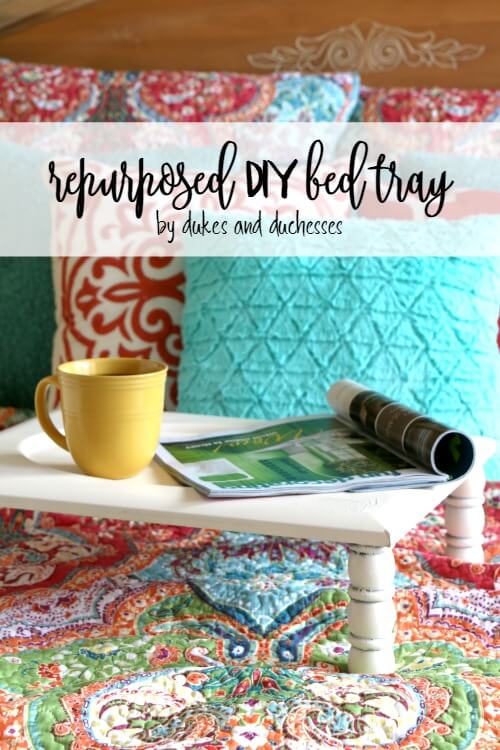
For more repurposed ideas for the home, check out this DIY repurposed bed tray made from an old cabinet door and spindles …
… a magnetic locker door memo board …

… and a repurposed book caddy made from an old table!


That is so darn cute Randi. I love your colorful bedding too.
That’s just brilliant Randi. I really love this idea for a bench at the bottom of the bed, especially in a small room. No hard corners to bump into.
great ideas!!