• Home
  • Start Here
    • About Dukes and Duchesses
    • Collaborate/Contact
    • Privacy Policy
  • Holidays
    • New Year’s Eve/Day
    • Valentine’s Day
    • leap year
    • St. Patrick’s Day
    • April Fool’s Day
    • Easter
    • May Day
    • cinco de mayo
    • Mother’s Day
    • Father’s Day
    • Fourth of July
    • Halloween/Harvest
    • Thanksgiving
    • Christmas
  • Crafts
    • general crafts
    • Cricut projects
    • printables
    • painting
    • sewing
    • knitting
  • DIY
  • Repurposed
  • Parties
    • Birthday
    • Entertaining
  • Recipes
  • Home Decor
    • Decor
    • home improvement
    • plants and garden
    • housekeeping
    • organization
  • travel
    • general travel
    • Dallas

Dukes and Duchesses

Dallas Fort Worth Creative Lifestyle Blogger

homefront painting thrifty treasures · Written by Randi Dukes

Trash to Treasure Painted Dresser

15 shares
  • Tweet
  • Share

A few months ago I was driving through the neighborhood when I spotted a dresser in someone’s trash pile.  I grabbed my Dad {and his minivan} and snagged a great piece of furniture.  It’s amazing what people throw away!  {I think in my neighborhood they’re quite sure someone will come and scoop it up before the garbage truck ever arrives.}   I painted the dresser with DIY chalky finish paint and wanted to share this trash to treasure painted dresser and the technique I used.

trash to treasure painted dresser painted with DIY chalky finish paint

This trash to treasure dresser is a new favorite piece of furniture in my dining room and I feel like I snagged a complete treasure out of someone’s trash.

Img 6922

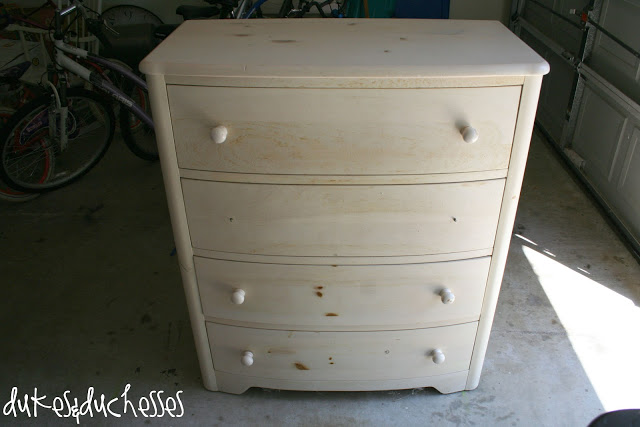
The dresser started like this.  Not bad at all, huh?  It had a few scratches, some ill-placed stickers, and two missing knobs.  Besides that, it was the sturdiest {and possibly the most expensive} dresser I’ve owned.

Img 6856

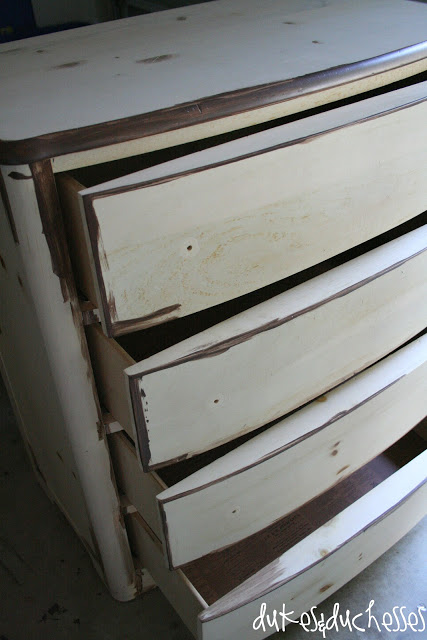
Knowing that I would paint the dresser and then distress it, I first painted some edges brown …

Img 6878

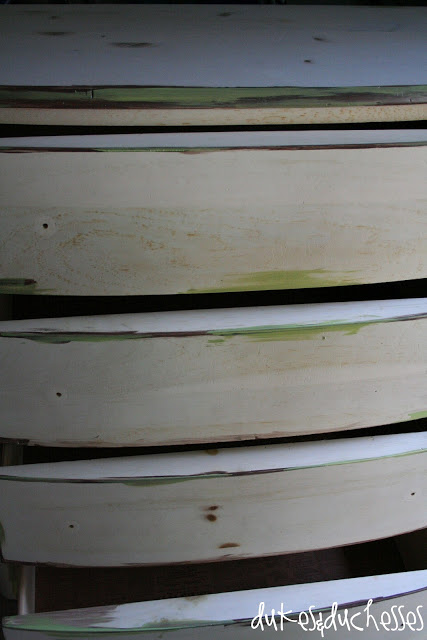
… and then painted a bit of green over it.

Img 6879

Once the edges were dry, I made a batch of DIY chalk finish paint and applied a couple of coats {the color is Haystack by Martha Stewart}.

When I was planning this project, I asked my twitter followers if they had any tips and I got a great tip from Dora the Restorer {isn’t that a great twitter handle?}.  She suggested I sand between coats of paint and before applying the wax.  I’ve always been nervous about doing that {for fear I’ll scrape off half the paint} but I sanded with an extra-fine sanding sponge and it made all the difference!  It gave the dresser such a smooth finish and will definitely be the technique I use with all future chalk painted projects.

Img 6884

I distressed the edges a bit more heavily to allow the brown and green undercoats to show through …

Img 6926

… then rubbed the dresser with finishing wax and added some mismatched glass knobs.

Img 6924

The newly painted dresser looks great in my dining room and it’s the perfect place to store my tablecloths and collection of heirloom linens.

DIY chalky finish painted dresser

Not bad for a curbside find, huh?

Img 6923


13 Comments

About Randi Dukes

I’m Randi, a Dallas-based mom of five kids, ranging from third grade to college and including a set of twins. I love strong coffee, craft and DIY projects, my planner, and my big ol’ family. When I’m not creating something for my blog, I can be found in the car, running kids from one place to another. I’m the one knitting at the red light. Connect with me on google+ | twitter | facebook

« Wrapping Up September
Paper Mache Halloween Treat Cups »

Comments

  1. Alexis says

    October 2, 2012 at 11:42 am

    Love it, great job. My kids get so mad at me…I stop for anything free on the curb!

    Reply
  2. Our Pinteresting Family says

    October 2, 2012 at 11:49 am

    So beautiful!!

    Reply
  3. barb says

    October 2, 2012 at 12:03 pm

    I love it, Randi! You did a great job. This is probably a dumb question but can you use chalk on it?

    Reply
  4. Linda says

    October 2, 2012 at 10:45 pm

    Awesome! I totally am livin’ on the wrong neighborhood!

    Reply
  5. Tonia L says

    October 3, 2012 at 4:05 pm

    Lovely job! It turned out great!

    Reply
  6. Ginger Walls says

    October 3, 2012 at 8:02 pm

    Nice job! It looks fabulous. I love the new color 🙂

    Ginger

    Reply
  7. Theresa says

    October 3, 2012 at 8:12 pm

    This turned out great! I love when that happens. I recently found some scratched up & in need of new seat fabric Pottery Barn chairs only 2 but, for the flee market price what a deal!! I have the post on my projects page. I love how they turned out. Just a little elbow grease & paint & definitely trash to treasure! Visiting from @ DearCreatives.com

    Reply
  8. Rebecca says

    October 7, 2012 at 3:48 am

    love this color yellow! i want to see all those doilies 🙂

    found you at miss mustard seed.
    there’s a party at my place if you feel like linking up!

    Reply
  9. Rhonda says

    October 12, 2012 at 1:37 am

    What a great find and even better makeover! Visiting from Jennifer Rizzo…
    Rhonda @ home.made.

    Reply
  10. Jen @ Bungalov says

    October 12, 2012 at 4:58 am

    OK seriously??? What a lucky find. LOVe it!!! Sincerely, Super Jealous 🙂

    Reply
  11. Helen Graham says

    October 14, 2012 at 4:52 pm

    Visiting from Jennifer Rizzo. I totally miss curbside furniture. I used to live in Canada and now I live in the UK and its just not done over here 🙁 you’ve done a great job with this find! thanks for sharing 🙂

    Reply
  12. must love junk says

    October 16, 2012 at 12:03 am

    I cannot believe the stuff people throw out! I love it! I just found you and am your newest follower-I’d love you to visit 🙂
    Susan

    Reply
  13. Lizzie says

    January 8, 2013 at 4:12 am

    Gorgeous redo–I especially love the combination of different glass knobs! And what a great find to begin with! Found you via Roadkill Rescue.
    -Lizzie

    Reply

Leave a Reply Cancel reply

Your email address will not be published. Required fields are marked *

  • Facebook
  • Instagram
  • Pinterest
  • Twitter
  • YouTube

Welcome to Dukes & Duchesses!

randi dukes

I’m Randi, a mom of five living in Dallas. I love strong coffee, long lists, bright colors, thrift stores, repurposed junk, and power tools.

how to plant a sweet tea garden

Southern Sweet Tea Container Garden

colorful wood DIY garden marker

DIY Wood Veneer Plant Markers

creative outdoor garden ideas

8 Creative Ideas for Your Outdoor Garden

DIY herb garden markers

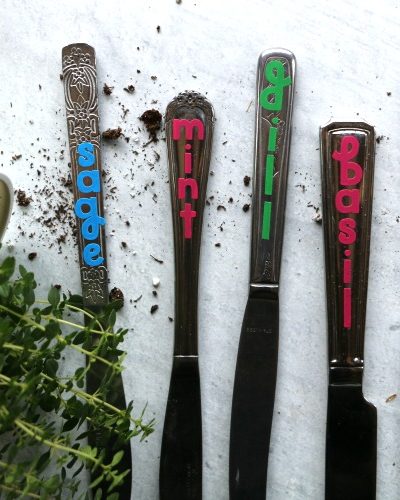
DIY Upcycled Knife Garden Markers

upcycled cutting board sign in beverage garden

DIY Beverage or Cocktail Garden

Dukes and Duchesses is a participant in the Amazon Services LLC Associates Program, an affiliate advertising program designed to provide a means for sites to earn advertising fees by advertising and linking to Amazon.com.
Any content on this website is created for inspirational purposes only. You assume your own risk for using any methods, tools, or supplies suggested here. Follow proper guidelines for every tool or supply used and obtain professional guidance as needed.

Copyright © 2025 · Randi Dukes · Wordpress Hosting by SERVOUSLY