• Home
  • Start Here
    • About Dukes and Duchesses
    • Collaborate/Contact
    • Privacy Policy
  • Holidays
    • New Year’s Eve/Day
    • Valentine’s Day
    • leap year
    • St. Patrick’s Day
    • April Fool’s Day
    • Easter
    • May Day
    • cinco de mayo
    • Mother’s Day
    • Father’s Day
    • Fourth of July
    • Halloween/Harvest
    • Thanksgiving
    • Christmas
  • Crafts
    • general crafts
    • Cricut projects
    • printables
    • painting
    • sewing
    • knitting
  • DIY
  • Repurposed
  • Parties
    • Birthday
    • Entertaining
  • Recipes
  • Home Decor
    • Decor
    • home improvement
    • plants and garden
    • housekeeping
    • organization
  • travel
    • general travel
    • Dallas

Dukes and Duchesses

Dallas Fort Worth Creative Lifestyle Blogger

creative projects Silhouette · Written by Randi Dukes

A Hexagon Honeycomb Tray

207 shares
  • Tweet37
  • Share

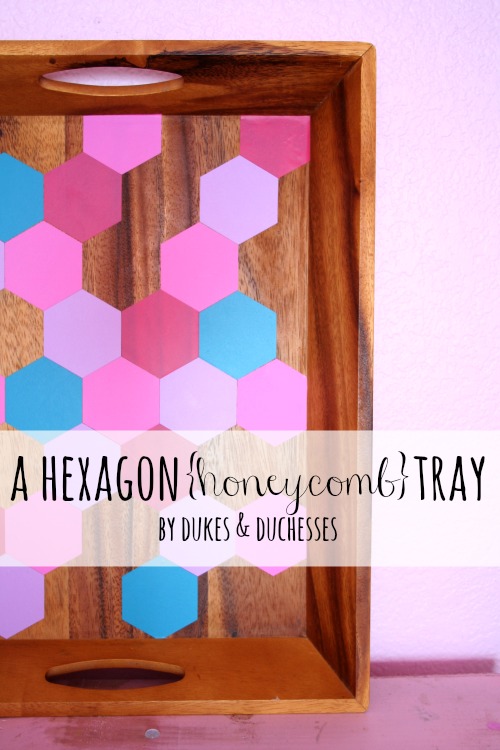
Hexagons and honeycomb patterns are so popular right now and I have a fun {and super easy} project to share with you: a hexagon honeycomb tray.  This was such a fun little project, kind of like putting together a jigsaw puzzle.  Let me show you how I made it.

hexagon honeycomb tray

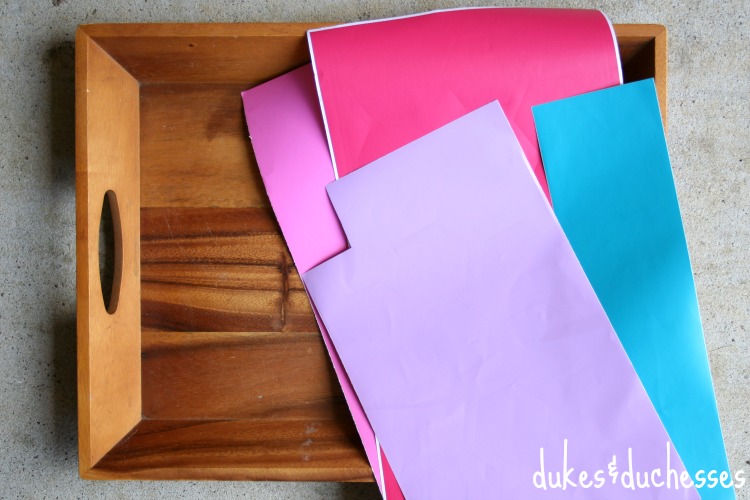
You’ll need a wooden tray {check your local thrift store for a cheap tray if you don’t have one at home} and vinyl in various, coordinating colors.  The great thing about this project is it can be as temporary or as permanent as you like.  Keep the tray covered in vinyl hexagons forever or peel them off when you get tired of it and you have a clean slate.

Using a cutting machine, cut hexagons in every color.  Mine are about an inch wide.  If you don’t have a cutting machine, you could use a stencil or template and scissors … it’ll just take you a bit longer.

vinyl and tray

In order to ensure that you get off to a straight start, mark a line across the tray.  I used a piece of duct tape and lined it up with the edge.

liner for level

Once the first couple of pieces were down, I removed the duct tape and continued on with my pattern.

vinyl hexagons

Lay the hexagons side by side, leave some spaces open, and just have fun with it.  I varied the colors but didn’t follow any particular pattern.  If you get to an edge, use a craft knife to trim the excess from your hexagon.

honeycomb pattern

Continue laying vinyl hexagons down until you’re happy with the pattern and then stop.  You’ll have a super cute, personalized tray!

honeycomb pattern with vinyl

Because the hexagons are made from vinyl, the tray can easily be wiped down … just be careful not to peel up the edges of the vinyl.

hexagon vinyl tray

And when you aren’t using it, display it … hexagons and honeycomb patterns are totally on-trend right now!


Leave a Comment

About Randi Dukes

I’m Randi, a Dallas-based mom of five kids, ranging from third grade to college and including a set of twins. I love strong coffee, craft and DIY projects, my planner, and my big ol’ family. When I’m not creating something for my blog, I can be found in the car, running kids from one place to another. I’m the one knitting at the red light. Connect with me on google+ | twitter | facebook

« Hatch Chile Guacamole {Two Ways}
DIY Rolling Storage Cart »

Leave a Reply Cancel reply

Your email address will not be published. Required fields are marked *

  • Facebook
  • Instagram
  • Pinterest
  • Twitter
  • YouTube

Welcome to Dukes & Duchesses!

randi dukes

I’m Randi, a mom of five living in Dallas. I love strong coffee, long lists, bright colors, thrift stores, repurposed junk, and power tools.

how to plant a sweet tea garden

Southern Sweet Tea Container Garden

colorful wood DIY garden marker

DIY Wood Veneer Plant Markers

creative outdoor garden ideas

8 Creative Ideas for Your Outdoor Garden

DIY herb garden markers

DIY Upcycled Knife Garden Markers

upcycled cutting board sign in beverage garden

DIY Beverage or Cocktail Garden

Dukes and Duchesses is a participant in the Amazon Services LLC Associates Program, an affiliate advertising program designed to provide a means for sites to earn advertising fees by advertising and linking to Amazon.com.
Any content on this website is created for inspirational purposes only. You assume your own risk for using any methods, tools, or supplies suggested here. Follow proper guidelines for every tool or supply used and obtain professional guidance as needed.

Copyright © 2025 · Randi Dukes · Wordpress Hosting by SERVOUSLY