• Home
  • Start Here
    • About Dukes and Duchesses
    • Collaborate/Contact
    • Privacy Policy
  • Holidays
    • New Year’s Eve/Day
    • Valentine’s Day
    • leap year
    • St. Patrick’s Day
    • April Fool’s Day
    • Easter
    • May Day
    • cinco de mayo
    • Mother’s Day
    • Father’s Day
    • Fourth of July
    • Halloween/Harvest
    • Thanksgiving
    • Christmas
  • Crafts
    • general crafts
    • Cricut projects
    • printables
    • painting
    • sewing
    • knitting
  • DIY
  • Repurposed
  • Parties
    • Birthday
    • Entertaining
  • Recipes
  • Home Decor
    • Decor
    • home improvement
    • plants and garden
    • housekeeping
    • organization
  • travel
    • general travel
    • Dallas

Dukes and Duchesses

Dallas Fort Worth Creative Lifestyle Blogger

creative projects homefront repurposed thrifty treasures · Written by Randi Dukes

A DIY Exit Sign Nightlight

260 shares
  • Tweet42
  • Share

Remember when I found my exit sign in Canton? I had great plans to use it as decor in my kids’ bathroom update but ended up going in a totally different direction. My $4 exit sign is now repurposed into a DIY exit sign nightlight in Luke’s room!

a DIY exit sign nightlight

I started with the exit sign and picked up an old Scentsy from the thrift store.  Part of it was missing and it was begging to be repurposed into something bigger and better.

cord from scentsy

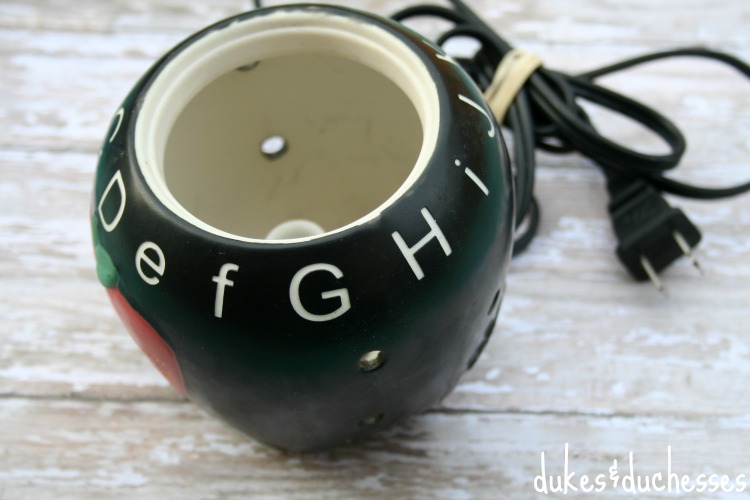
I removed the screw that held the light fixture in place then smashed the warmer with a hammer to remove the rest of the cord.

removing cord from scentsy

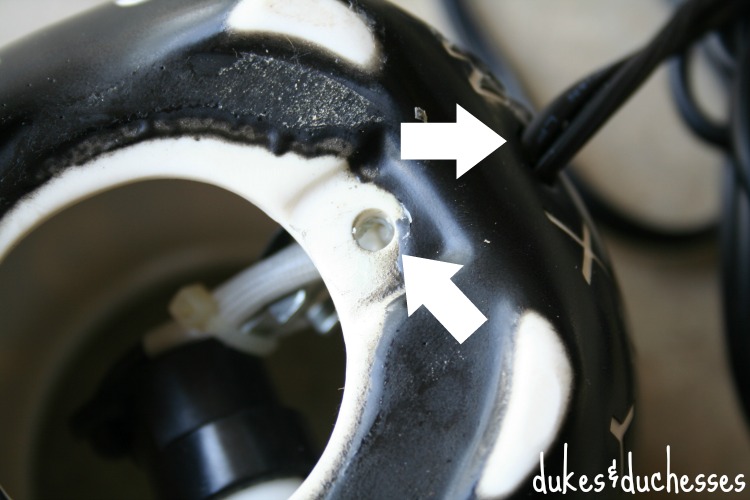
I was left with a fixture that fits a low-wattage nightlight-style bulb and turns on and off with a slider switch.

nightlight parts

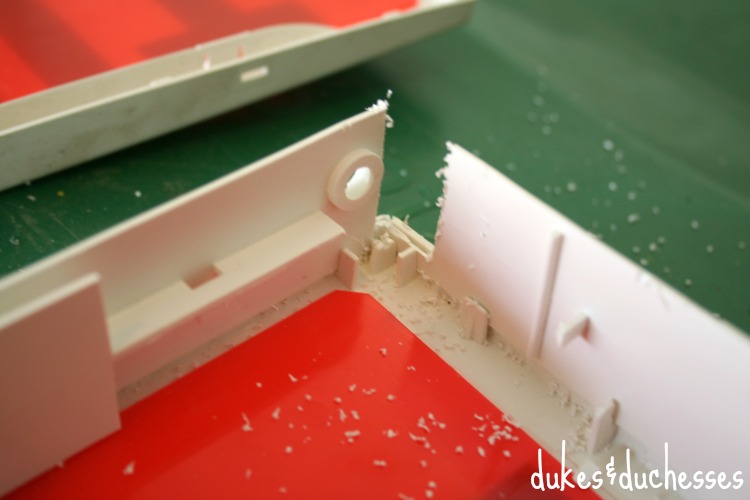
The next step was to prepare the exit sign.  I opened up the sign, then used a hacksaw to cut a small hole for the lightbulb to fit through.

hacksaw hole

I made the hole just big enough to house the fixture and removed the extra wiring, batteries, and LED lights remaining in the exit sign.

hole for light fixture

At the bottom of the side, I used the hacksaw to cut one more small hole so the cord can run from the inside without tipping over the light.

hole for cord

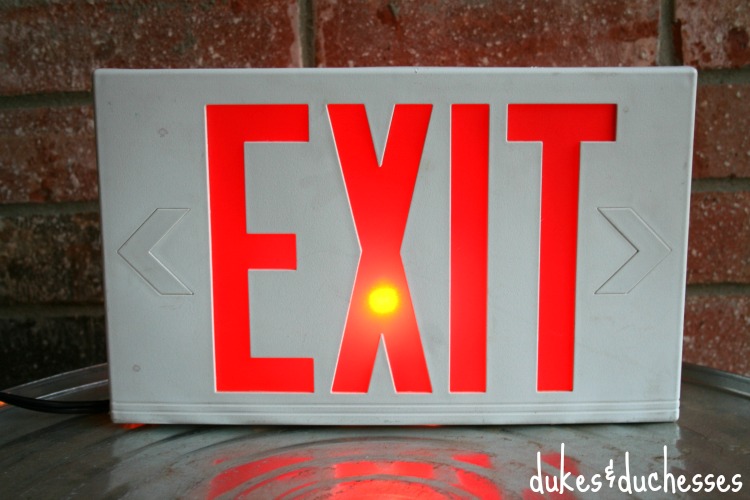
I fitted the fixture into place, drilled a small pilot hole, and screwed the fixture in its spot so it won’t wiggle around and the lightbulb won’t lean against the plastic.  {Note:  before screwing the fixture into place, I let the bulb stay on for quite some time to ensure that it wouldn’t get too hot and cause any of the plastic to melt.  If you make a nightlight like this one, don’t eliminate this step!}

screwed fixture in place

That’s it!  Luke now has a completely unique, fun, somewhat industrial style nightlight … and I love this repurposed project!

repurposed nightlight


5 Comments

About Randi Dukes

I’m Randi, a Dallas-based mom of five kids, ranging from third grade to college and including a set of twins. I love strong coffee, craft and DIY projects, my planner, and my big ol’ family. When I’m not creating something for my blog, I can be found in the car, running kids from one place to another. I’m the one knitting at the red light. Connect with me on google+ | twitter | facebook

« Pantry Door Chalkboard
25 Carrot-Themed Crafts and Recipes for Easter »

Comments

  1. Michele says

    March 25, 2014 at 11:04 am

    What a great idea! Thanks for the tutorial, my boys would love this in their bedroom…how cool would that be?!

    Reply
  2. Megan @ Our Pinteresting Family says

    March 27, 2014 at 9:30 am

    What a fun idea, Randi!

    Reply
  3. Ashley ~ 3 Little Greenwoods says

    July 28, 2017 at 8:26 am

    How cool would this be for a teenage boys’ hangout room? Love how you pieced it together!

    Reply
  4. Linda at Mixed Kreations says

    July 28, 2017 at 9:24 am

    What a great idea! Makes for a fun night light, and not to bright. I think that my grand daughter would even like this.

    Reply
  5. Jennifer Fouts says

    January 3, 2018 at 1:42 pm

    Hi, linked to your post from one of mine discussing this topic. Great work! All that inner wiring to me seems intimidating but you handled it like a champ!

    Reply

Leave a Reply Cancel reply

Your email address will not be published. Required fields are marked *

  • Facebook
  • Instagram
  • Pinterest
  • Twitter
  • YouTube

Welcome to Dukes & Duchesses!

dukes and duchesses profile photo

I’m Randi, a mom of five living in Dallas. I love strong coffee, long lists, bright colors, thrift stores, repurposed junk, and power tools.

how to plant a sweet tea garden

Southern Sweet Tea Container Garden

colorful wood DIY garden marker

DIY Wood Veneer Plant Markers

creative outdoor garden ideas

8 Creative Ideas for Your Outdoor Garden

DIY herb garden markers

DIY Upcycled Knife Garden Markers

upcycled cutting board sign in beverage garden

DIY Beverage or Cocktail Garden

Dukes and Duchesses is a participant in the Amazon Services LLC Associates Program, an affiliate advertising program designed to provide a means for sites to earn advertising fees by advertising and linking to Amazon.com.
Any content on this website is created for inspirational purposes only. You assume your own risk for using any methods, tools, or supplies suggested here. Follow proper guidelines for every tool or supply used and obtain professional guidance as needed.

Copyright © 2025 · Randi Dukes · Wordpress Hosting by SERVOUSLY

Copyright © 2025 · Divine Theme on Genesis Framework · WordPress · Log in