• Home
  • Start Here
    • About Dukes and Duchesses
    • Collaborate/Contact
    • Privacy Policy
  • Holidays
    • New Year’s Eve/Day
    • Valentine’s Day
    • leap year
    • St. Patrick’s Day
    • April Fool’s Day
    • Easter
    • May Day
    • cinco de mayo
    • Mother’s Day
    • Father’s Day
    • Fourth of July
    • Halloween/Harvest
    • Thanksgiving
    • Christmas
  • Crafts
    • general crafts
    • Cricut projects
    • printables
    • painting
    • sewing
    • knitting
  • DIY
  • Repurposed
  • Parties
    • Birthday
    • Entertaining
  • Recipes
  • Home Decor
    • Decor
    • home improvement
    • plants and garden
    • housekeeping
    • organization
  • travel
    • general travel
    • Dallas

Dukes and Duchesses

Dallas Fort Worth Creative Lifestyle Blogger

building creative projects homefront painting · Written by Randi Dukes

DIY Color Block Umbrella Table

4671 shares
  • Tweet40
  • Share16

I am proud to be a 3M- sponsored blogger, and, as part of my responsibilities, I get the opportunity to evaluate new products from ScotchBlue™ Painter’s Tape. Opinions are my own and additional product used in the project were selected by me.

I’m so excited to share this fun outdoor project that’s just perfect for summer: a DIY color block umbrella table!

DIY color block umbrella table

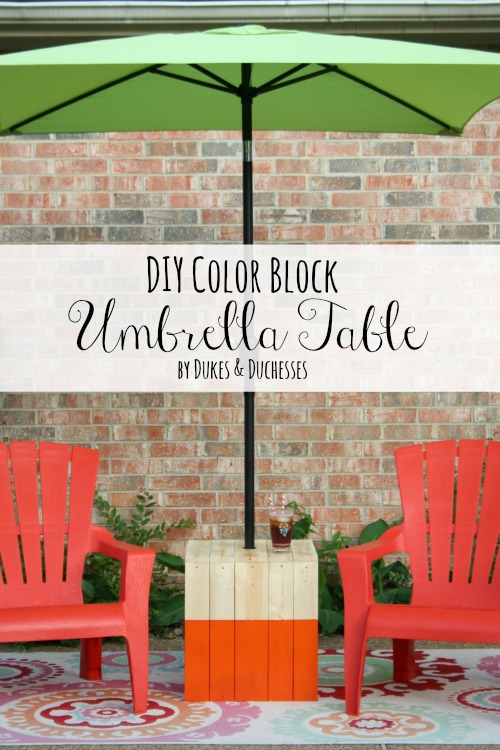
This planked table project is simple enough for the beginner builder and the color block painting adds a fun and colorful element just perfect for summer!

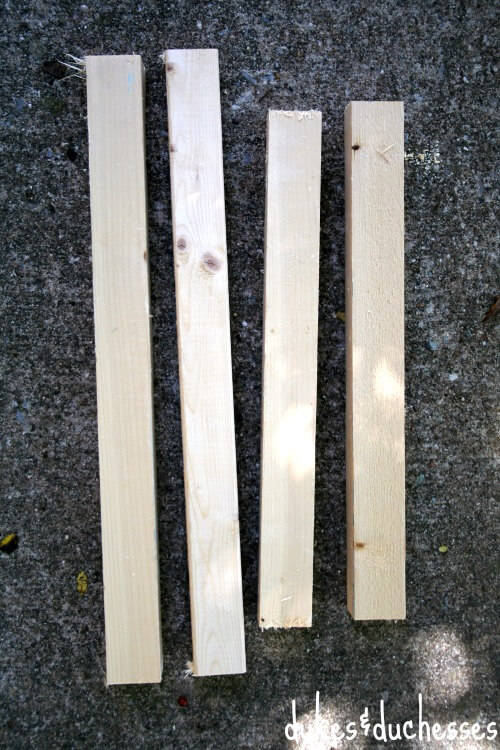
To build the table, you’ll need the following supplies from The Home Depot: 4 2×2-inch pieces cut to a length of 19 inches, 4 2×2-inch pieces cut to a length of 16 inches, 2 1×6-inch pieces cut to a length of 20 inches, 18 1×4-inch pieces cut to a length of 20 inches, 1 1×6-inch piece cut to a length of 19 inches, and 4 1×4-inch pieces cut to a length of 19 inches.  In addition you’ll need wood screws, tools, and ScotchBlue™ Painter’s Tape.

Before you begin, you’ll need the staff at The Home Depot to trim 1/2 an inch off the width of the 1×6-inch pieces.  You can also have them trim your boards to the appropriate length while you’re at it.

To build the table, I made two slightly rectangular frames by attaching two of the 19 inch 2×2’s to two of the 16 inch 2×2’s {the shorter 2×2’s will sit inside the others}.

frame D

One frame will sit at the top of the table and one frame will form the base.

box frame D

Beginning with one side of the table, lay five 1×4 planks {20 inches long} side by side, flush with the top of one frame and the bottom of the other and drill pilot holes through the planks and into the frames.  Insert wood screws into each pilot hole, ensuring that the frames are sitting square.  Repeat on the opposite side.

framed table D

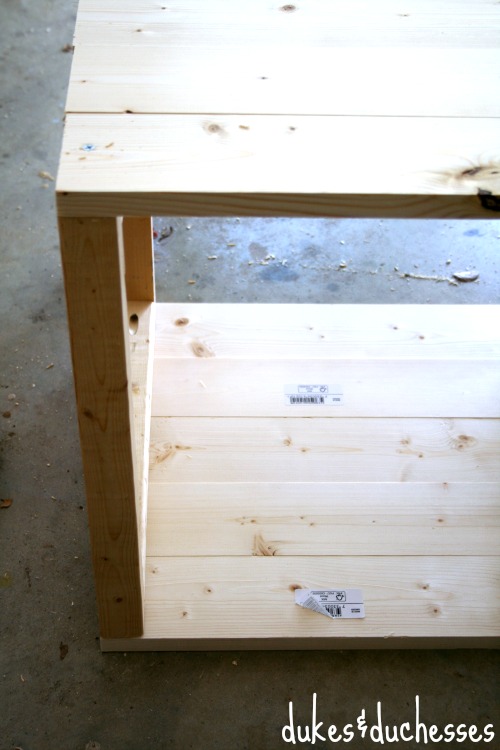
Repeat the process for the other two sides, using four 1×4 inch pieces and placing a wider {trimmed} 1×6-inch piece in the middle.  The planks on these two sides will cover the frame as well as the side of the planks on the two completed sides.

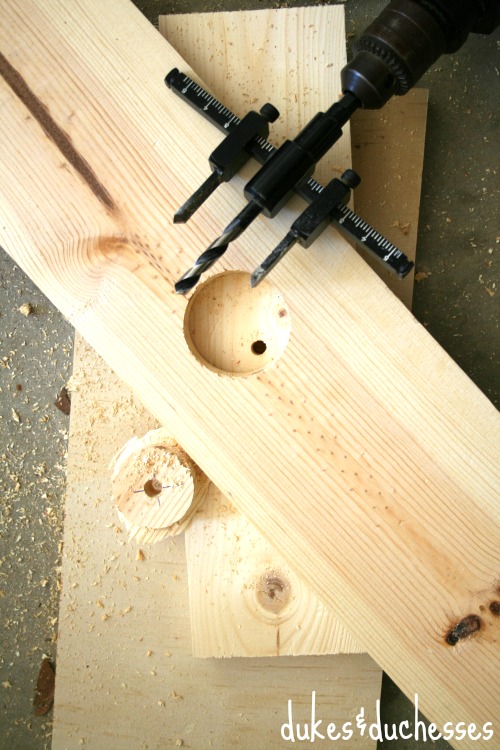
With the boards that are 19 inches in length, repeat that process {using a wider board in the middle} to form the top of the table.  Before screwing down the middle board, lay a board diagonally across the top and mark the center …

center of top D

… then drill a hole large enough to hold an umbrella post.  Secure the plank to the top of the table.

hole for umbrella D

Now that the building part is done, it’s time for the fun stuff: the painting!

Before you paint, sand all the rough edges and wipe the table down to remove all dust.

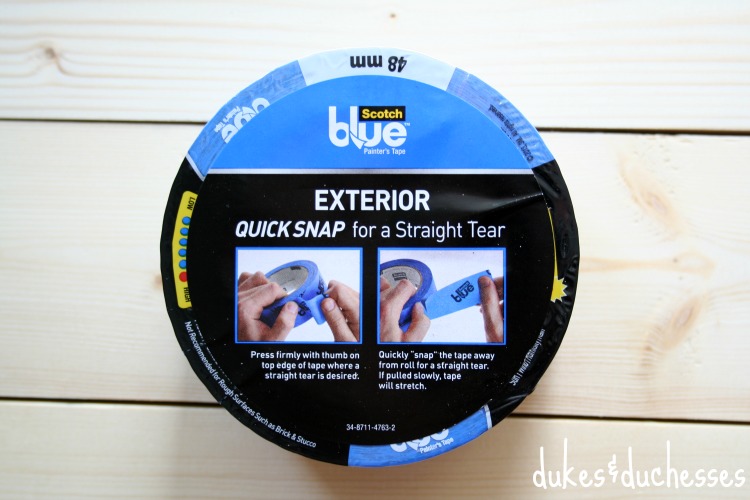
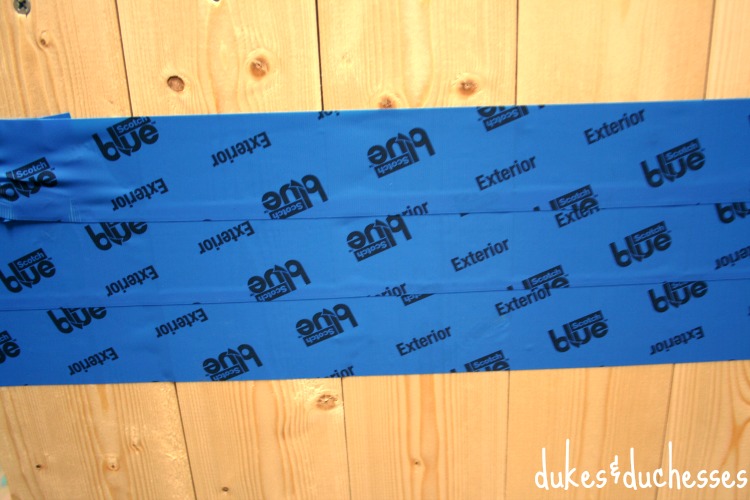
Since you’re only going to paint the lower half of the table, measure evenly around the table and place ScotchBlue™ Painter’s Tape along your measured line.  I used Exterior tape for this project.

scotchblue painter's tape D

Above the initial line of ScotchBlue™ Painter’s Tape, add a couple of extra lines of tape to block paint spray.

scotchblue D

Using a bright color, spray paint the bottom half of the umbrella table, applying a couple of coats if needed.

spray paint D

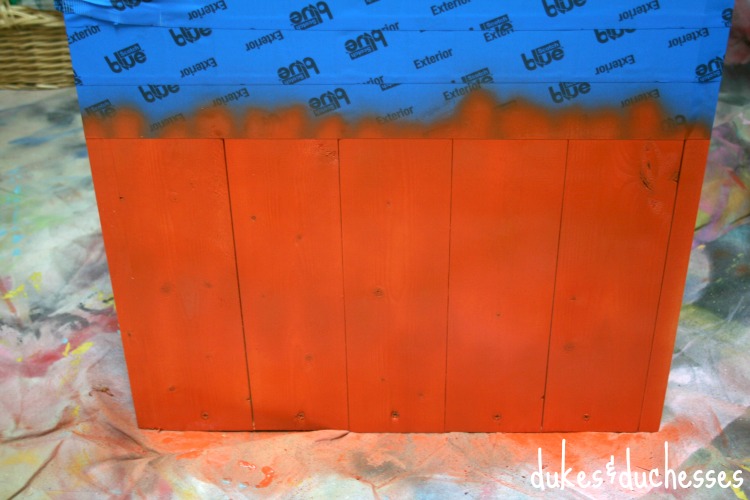
Allow the paint to dry and spray a coat of clear sealer to provide some protection from the elements.

Place an umbrella stand inside the table for support …

umbrella table D

… and enjoy the shade of your new color-blocked umbrella table!

pool seating D

This shady spot is where I’ll be spending my summer, sipping tea and watching the kids in the pool!

umbrella table seating D


15 Comments

About Randi Dukes

I’m Randi, a Dallas-based mom of five kids, ranging from third grade to college and including a set of twins. I love strong coffee, craft and DIY projects, my planner, and my big ol’ family. When I’m not creating something for my blog, I can be found in the car, running kids from one place to another. I’m the one knitting at the red light. Connect with me on google+ | twitter | facebook

« Chalkboard House Clock
A Family Room Makeover #BHGRefresh »

Comments

  1. Megan @ Our PInteresting Family says

    May 29, 2014 at 6:35 am

    I love this project, idea, Randi. It turned out great.

    Reply
  2. Megan says

    May 29, 2014 at 9:06 am

    Turned out so pretty! Love it!

    Reply
  3. Kimberly Sneed says

    May 29, 2014 at 10:37 am

    LOVE this project, Randi! The colors are fabulous!

    Reply
  4. Vanessa says

    May 29, 2014 at 11:19 am

    That is so amazing Randi! What a neat idea!

    Reply
  5. Bonnie @ Uncommon Designs says

    May 29, 2014 at 6:52 pm

    What a fabulous idea Randi!

    Reply
  6. Laura @ Make Life Lovely says

    May 29, 2014 at 7:47 pm

    What a great table! I love the bright color!

    Reply
  7. [email protected] says

    May 30, 2014 at 9:40 am

    Turned out amazing, Randi!! Loving that pop of color!

    Reply
  8. Kathy says

    June 2, 2014 at 8:40 am

    Wow, this is amazing. And nice pop of color!

    Reply
  9. Mary Beth @ Cupcakes and Crinoline says

    June 2, 2014 at 9:23 am

    Randi, this is one of my favorite projects I’ve seen and I love the night tight lines you got using the Scotch Blue. I have a huge shopping list for summer projects…adding this tape.

    Reply
  10. amy @ one artsy mama says

    June 2, 2014 at 9:34 am

    Love this! Fun color choices!

    Reply
  11. Heather says

    June 2, 2014 at 2:09 pm

    Love the color block effect! I love Scotch blue!

    Reply
  12. Jess @ Chaos & Love says

    June 2, 2014 at 9:19 pm

    This is so, so cute!

    Reply
  13. Stephanie, Sandpaper and Glue says

    June 4, 2014 at 7:22 am

    great idea, and so do-able!

    Reply
  14. [email protected] Vin'yet Etc. says

    June 4, 2014 at 8:24 am

    LOVE this!!! the colour blocking is so fresh and modern looking, pinned!!!

    Reply
  15. Amy Anderson says

    June 4, 2014 at 10:27 pm

    I love that table – simple and modern!

    Reply

Leave a Reply Cancel reply

Your email address will not be published. Required fields are marked *

  • Facebook
  • Instagram
  • Pinterest
  • Twitter
  • YouTube

Welcome to Dukes & Duchesses!

dukes and duchesses profile photo

I’m Randi, a mom of five living in Dallas. I love strong coffee, long lists, bright colors, thrift stores, repurposed junk, and power tools.

easy sweet rolls made with frozen bread rolls

The Easiest Sweet Roll Recipe

easy cold brew coffee popsicle recipe

Easy Cold Brew Popsicle Recipe

iced green tea latte recipe

The Best Iced Matcha Tea Latte Recipe

how to make caramel whipped coffee

Caramel Whipped Coffee Recipe

fresh pasta recipe

How to Make Fresh Pasta

Dukes and Duchesses is a participant in the Amazon Services LLC Associates Program, an affiliate advertising program designed to provide a means for sites to earn advertising fees by advertising and linking to Amazon.com.
Any content on this website is created for inspirational purposes only. You assume your own risk for using any methods, tools, or supplies suggested here. Follow proper guidelines for every tool or supply used and obtain professional guidance as needed.

Copyright © 2023 · Randi Dukes · Wordpress Hosting by SERVOUSLY

Copyright © 2023 · Divine Theme on Genesis Framework · WordPress · Log in