• Home
  • Start Here
    • About Dukes and Duchesses
    • Collaborate/Contact
    • Privacy Policy
  • Holidays
    • New Year’s Eve/Day
    • Valentine’s Day
    • leap year
    • St. Patrick’s Day
    • April Fool’s Day
    • Easter
    • May Day
    • cinco de mayo
    • Mother’s Day
    • Father’s Day
    • Fourth of July
    • Halloween/Harvest
    • Thanksgiving
    • Christmas
  • Crafts
    • general crafts
    • Cricut projects
    • printables
    • painting
    • sewing
    • knitting
  • DIY
  • Repurposed
  • Parties
    • Birthday
    • Entertaining
  • Recipes
  • Home Decor
    • Decor
    • home improvement
    • plants and garden
    • housekeeping
    • organization
  • travel
    • general travel
    • Dallas

Dukes and Duchesses

Dallas Fort Worth Creative Lifestyle Blogger

creative projects parties/entertaining · Written by Randi Dukes

How to Make a Photo Booth Backdrop

612 shares
  • Tweet10
  • Share2

Homemade photo booths are so popular but do you ever wonder what to use as a backdrop?  I’ve used sheets and blank walls but it’s so easy to make something festive and colorful to match the theme or color for your party.  Let me show you how to make a photo booth backdrop so your next party is picture perfect!

how to make a photo booth backdrop

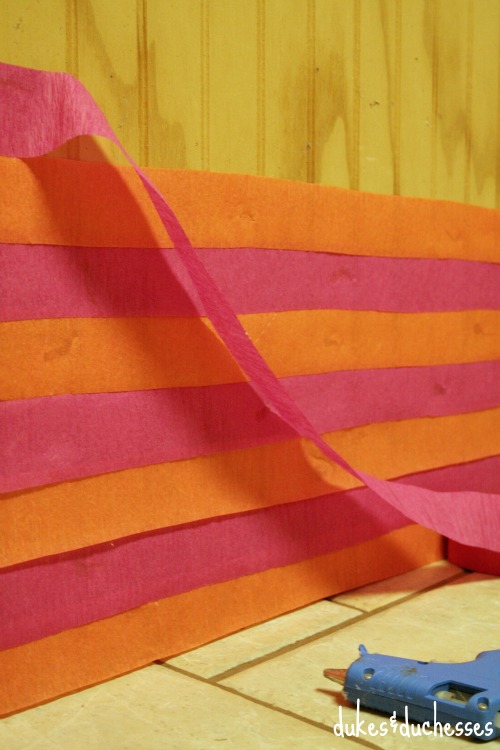
Grab a few rolls of crepe paper streamers from a party store or even your grocery store.  Choose a monochromatic theme or mix together a couple of bright colors.  You could even choose complementary shades and create a neat ombre effect.

crepe paper streamers for DIY photo booth

Find a large, solid piece of wood or foam board to use as the back drop.  Make sure it’s tall enough and wide enough so people can easily fit in front of it.  The best pictures happen when you can’t see the borders of the backdrop.

background for photo booth backdrop

Starting at the bottom, use hot glue to attach the streamers across the board.  You don’t need to glue all the way across, just in spots as you go.  Wrap the ends around the back of the board and secure them in place with hot glue.  As you add new streamers, slightly overlap the streamer below so none of the board shows.

Continue adding streamers all the way until the entire board is covered.

crepe paper streamers on photo booth backdrop

It’s a bit time consuming to glue the streamers in place but the final effect is bright and colorful and provides a really fun and festive backdrop for a party.

DIY photo booth backdrop

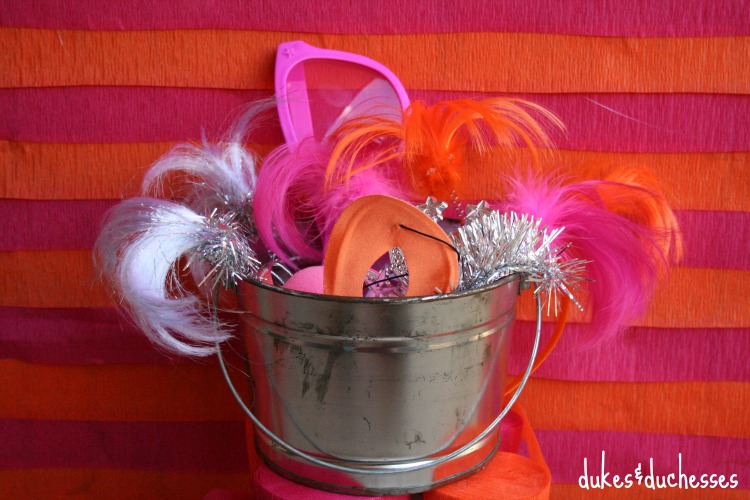
Print out a few props {you’ll find lots on the internet but I love these photo booth props from Love the Day} or grab a few things at the party store or your local dollar store.  Think about colors as you’re preparing the photo booth props.  Coordinating the props with the backdrop will add a cohesiveness to the photos.

photo booth props

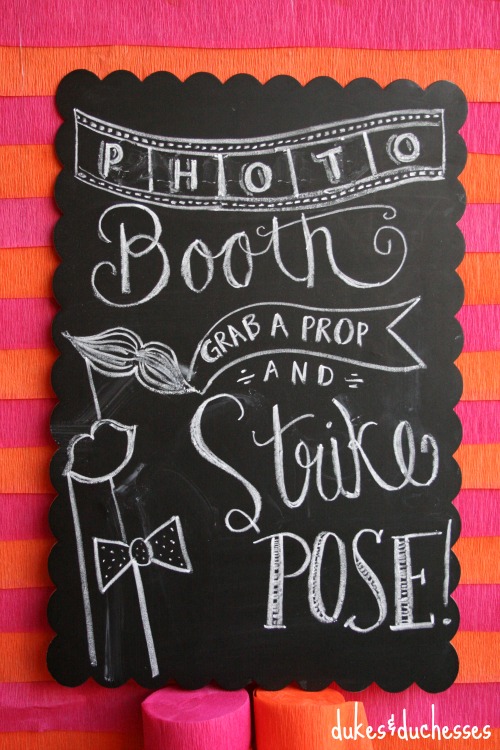
Finally, add some fun chalk art {the tutorial for this photo booth chalk art came from ‘The Complete Book of Chalk Lettering‘ [affiliate link]} and let your guests go to town, striking poses and creating memories!

photo booth chalk art

Need another idea for a backdrop?  DIY paper rosettes are perfect!


5 Comments

About Randi Dukes

I’m Randi, a Dallas-based mom of five kids, ranging from third grade to college and including a set of twins. I love strong coffee, craft and DIY projects, my planner, and my big ol’ family. When I’m not creating something for my blog, I can be found in the car, running kids from one place to another. I’m the one knitting at the red light. Connect with me on google+ | twitter | facebook

« A Last Minute Jessie Costume
How to Print Photos from a Photo Booth »

Comments

  1. Jill says

    October 28, 2015 at 10:45 am

    Looks easy and lots of fun.

    Reply
  2. Alayna @AlaynasCreations says

    November 1, 2015 at 7:21 pm

    Great idea! Looking at the backdrop from far away I would never have guessed it was simply crepe paper. Those masks in a bucket are the perfect touch too.

    I am co-hosting the #HomeMatterParty link party this month and would love to have you stop by for a visit. The current party is open through Monday night or join us for the new party on Friday.

    Reply
  3. Kara Woolery says

    November 3, 2015 at 7:26 pm

    What a great idea to use crepe paper! Love the colors too! I found you on the link party palooza! Nice to meet you:-)

    Reply
  4. Lana says

    November 5, 2015 at 10:11 pm

    You’ve inspired me to do something like this for a farewll party. Good to take photos

    Reply
  5. Emma says

    November 6, 2015 at 2:04 am

    Well that just sounds like fun! I’m going to remember this one for my daughter’s birthday party!

    Reply

Leave a Reply Cancel reply

Your email address will not be published. Required fields are marked *

  • Facebook
  • Instagram
  • Pinterest
  • Twitter
  • YouTube

Welcome to Dukes & Duchesses!

randi dukes

I’m Randi, a mom of five living in Dallas. I love strong coffee, long lists, bright colors, thrift stores, repurposed junk, and power tools.

how to plant a sweet tea garden

Southern Sweet Tea Container Garden

colorful wood DIY garden marker

DIY Wood Veneer Plant Markers

creative outdoor garden ideas

8 Creative Ideas for Your Outdoor Garden

DIY herb garden markers

DIY Upcycled Knife Garden Markers

upcycled cutting board sign in beverage garden

DIY Beverage or Cocktail Garden

Dukes and Duchesses is a participant in the Amazon Services LLC Associates Program, an affiliate advertising program designed to provide a means for sites to earn advertising fees by advertising and linking to Amazon.com.
Any content on this website is created for inspirational purposes only. You assume your own risk for using any methods, tools, or supplies suggested here. Follow proper guidelines for every tool or supply used and obtain professional guidance as needed.

Copyright © 2025 · Randi Dukes · Wordpress Hosting by SERVOUSLY