This upcycled cuckoo clock post contains affiliate links.
You know I love to repurpose and this time I repurposed something that usually goes straight to my recycling bin: old cereal boxes! This week my bin was a little lighter and my family room is sporting a little more whimsy with an upcycled cuckoo clock made from a cereal box!

I have a real thing for cuckoo clocks and I look for them every time I’m at the thrift store but I’ve never been able to find one. I decided it might be fun to try making one … and since I was using mostly items that I found around my house, it was really cost effective {which means I can change it out when a new thought strikes}.
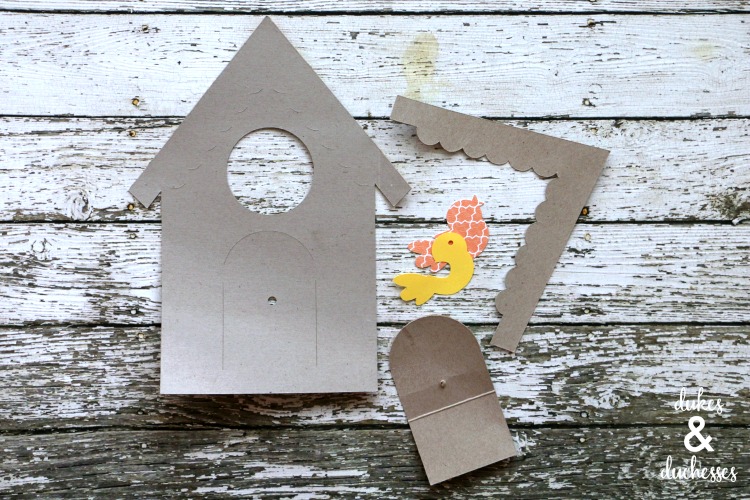
To make this DIY cuckoo clock, I used two cardboard cereal boxes, a clock making kit {with 1/4 inch shaft}, yarn, and paint. And, my Cricut Maker, of course!

I used a house image I found in Cricut Design Space and altered it slightly. I added a circle for the bird to pop out of, and made a small hole in the door so the clock shaft could poke through.
I also cut out a cute little bird image.
I spray painted the various parts with a coat of colorful spray paint {I used colors that match the colors in my decor} and let the pieces dry then assembled it all together with hot glue.
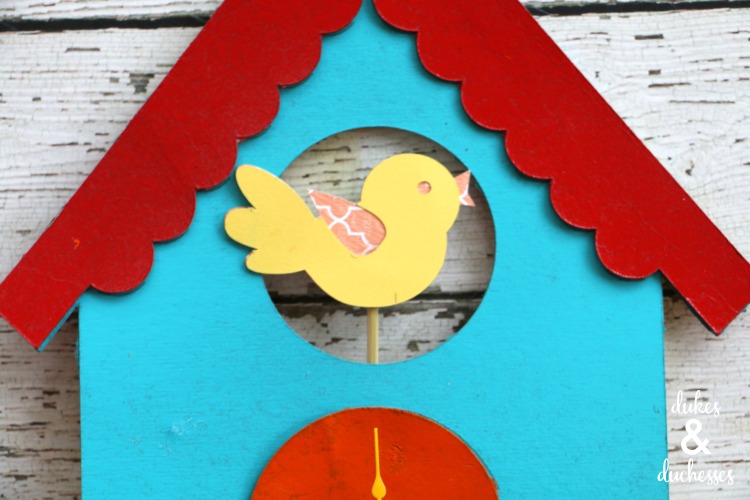
I attached the little bird to a piece of wooden skewer and hot glued that on to the back of the clock with the bird sticking out the front. Unlike a regular cuckoo clock, this bird won’t move but it still looks really cute.
Then I attached the clock making kit according to the package instructions {if you haven’t used a clock making kit before, it’s as simple as placing the various pieces on the shaft and screwing a tiny cap on the end}.

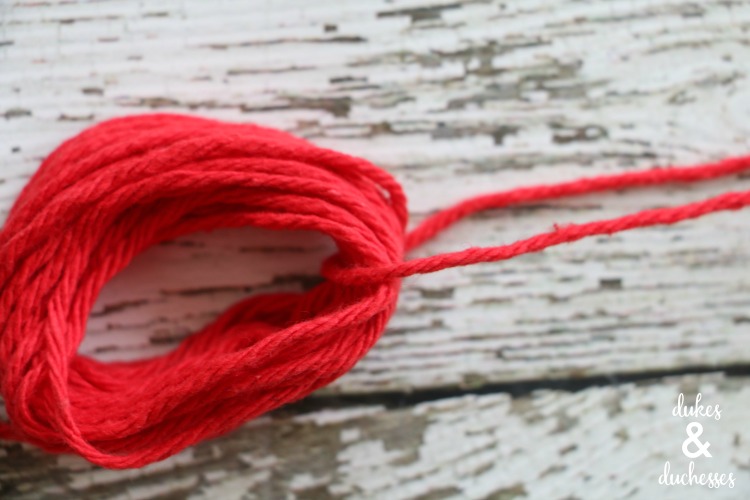
I love the little weights that hang from old cuckoo clocks so I added my own whimsical version with red yarn tassels.
To make a quick and easy tassel, wrap yarn around four fingers about twenty-five times …

… pull a string through the top {this is how it’ll hang from the clock} …
… tie another piece of yarn around the strands, just below the top …

… cut the bottom loop open …
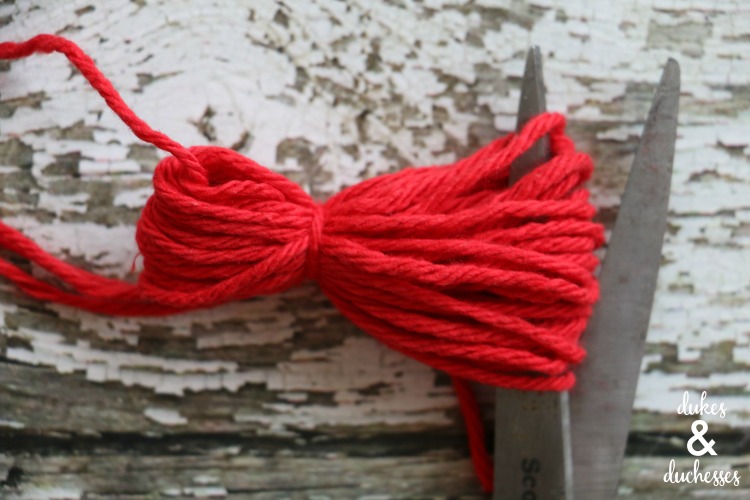
… and trim as needed. I hot glued them to the clock at different heights to resemble real clock weights.

And that’s all there is to it!
The clock kit has a hanger attached so the clock can easily be hung anywhere …

… and mine is adding a colorful and whimsical touch …

… to an already colorful room in our home!


How fun is that! I love how bright and colorful it is. I’ll bet it makes you smile each time you see it.
What a cute idea! I love the bright colors!
What a fun idea, and super cute! Love the bright happy colors! I have an old cuckoo clock that my mom brought back from Switzerland about 35 years ago. I need to get it fixed. One of the hands broke off and it stops shortly after winding.