• Home
  • Start Here
    • About Dukes and Duchesses
    • Collaborate/Contact
    • Privacy Policy
  • Holidays
    • New Year’s Eve/Day
    • Valentine’s Day
    • leap year
    • St. Patrick’s Day
    • April Fool’s Day
    • Easter
    • May Day
    • cinco de mayo
    • Mother’s Day
    • Father’s Day
    • Fourth of July
    • Halloween/Harvest
    • Thanksgiving
    • Christmas
  • Crafts
    • general crafts
    • Cricut projects
    • printables
    • painting
    • sewing
    • knitting
  • DIY
  • Repurposed
  • Parties
    • Birthday
    • Entertaining
  • Recipes
  • Home Decor
    • Decor
    • home improvement
    • plants and garden
    • housekeeping
    • organization
  • travel
    • general travel
    • Dallas

Dukes and Duchesses

Dallas Fort Worth Creative Lifestyle Blogger

sewing · Written by Randi Dukes

DIY Wrap with Toggle Closure

409 shares
  • Tweet44
  • Share216

The other day my friend was wearing the cutest wrap from a boutique.  It was perfect for our fall weather and I knew I could make one in just minutes for a fraction of the price.  This DIY wrap with toggle closure is simple enough that even a beginner sewer can make it … and wouldn’t it be a great homemade gift for a friend or family member?

DIY wrap with toggle closure

To make one, you’ll need a square of fabric 55 inches across, preferably a woven wool or something similar.  Using a woven fabric will allow the edges to fringe and prevent the need for hemming.  Be sure the fabric you choose is not too thick or it won’t drape properly.  I used a lightweight wool that I found in the upholstery fabric section.  That area is perfect since the width of the fabric is generally 55 inches or larger.  To complete the wrap, you’ll also need a large toggle {affiliate link}.

fabric for DIY wrap with toggle closure

Cut the edges of your fabric so that the piece is perfectly square.  Don’t cut the selvage edges which should already have a fringe on them.

cutting edges of wrap

Stitch a line on both cut edges about half an inch from the edge, then pull threads out to create a fringe on the cut sides.  The stitched line will prevent the material from unraveling too far back.

fringe on DIY wrap with toggle closure

Fold the fabric in half, creating a triangle shape …

folded wrap

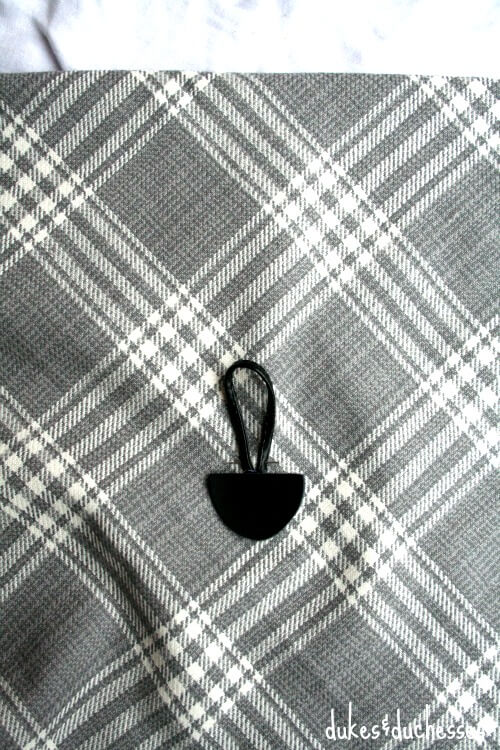
… and pin the toggle pieces in place, one on each side.  Make sure the loops face up toward the straight folded edge of the triangle and place the toggle eight inches from the top folded edge and twelve inches in from the side.  Stitch each piece of the toggle closure in place.

toggle closure for DIY wrap

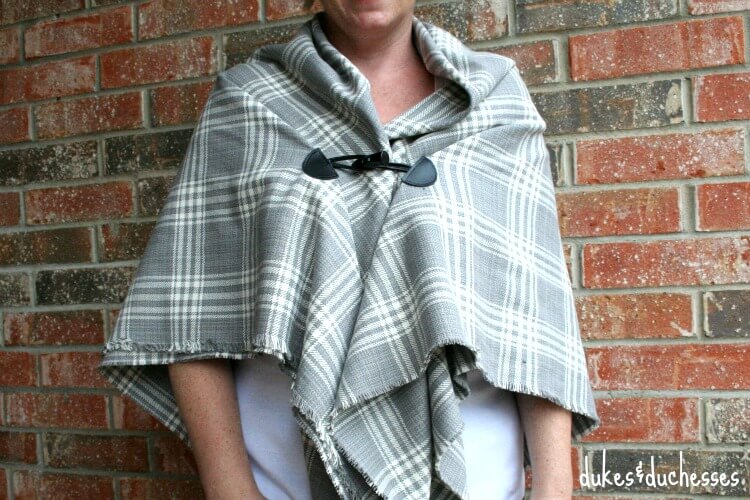
It’s as easy as that.  To wear this DIY wrap, drape it across your shoulders, allowing the neckline to bunch together, and attach the toggle together.  It’s such a simple project but looks so cute with any outfit.

DIY toggle closure wrap

If you make one, be sure to upload a photo to the Dukes and Duchesses facebook page!


4 Comments

About Randi Dukes

I’m Randi, a Dallas-based mom of five kids, ranging from third grade to college and including a set of twins. I love strong coffee, craft and DIY projects, my planner, and my big ol’ family. When I’m not creating something for my blog, I can be found in the car, running kids from one place to another. I’m the one knitting at the red light. Connect with me on google+ | twitter | facebook

« Easy Homemade Cat Treats
How to Make DIY Dinosaurs »

Comments

  1. Julie says

    November 22, 2015 at 3:50 pm

    That’s lovely. I have treated myself to a beautiful blanket scarf but now I’m thinking adding a toggle fastening might make it even more useful. I can hide it in the folds to use it like a regular scarf or use the toggle for more of a shawl look. Thanks for the great inspiration.

    Reply
  2. Erin - Suburban Simplicity says

    November 24, 2015 at 4:33 pm

    You are so talented! Thanks for sharing the idea!

    Reply
  3. Kira Brennan says

    November 25, 2015 at 8:40 pm

    Super cute! I love the material you used.

    Reply
  4. Hil says

    November 27, 2015 at 6:42 am

    My sister makes cloaks out of fleece, I would love for her to try these next!

    Reply

Leave a Reply Cancel reply

Your email address will not be published. Required fields are marked *

  • Facebook
  • Instagram
  • Pinterest
  • Twitter
  • YouTube

Welcome to Dukes & Duchesses!

dukes and duchesses profile photo

I’m Randi, a mom of five living in Dallas. I love strong coffee, long lists, bright colors, thrift stores, repurposed junk, and power tools.

floral focal wall

How to Create a Focal Wall with Wallpaper

kitchen cabinet organization ideas

How to Maximize Kitchen Space

painted log wreath on red painted door

Red Painted Front Door with PPG Paints

light fixture update

Updated Dining Room Light Fixture

motion sensor for home security

How to DIY a Smart and Secure Home

Dukes and Duchesses is a participant in the Amazon Services LLC Associates Program, an affiliate advertising program designed to provide a means for sites to earn advertising fees by advertising and linking to Amazon.com.
Any content on this website is created for inspirational purposes only. You assume your own risk for using any methods, tools, or supplies suggested here. Follow proper guidelines for every tool or supply used and obtain professional guidance as needed.

Copyright © 2023 · Randi Dukes · Wordpress Hosting by SERVOUSLY

Copyright © 2023 · Divine Theme on Genesis Framework · WordPress · Log in