This is a sponsored conversation written by me on behalf of Cricut and this post contains affiliate links. The opinions and text are all mine.
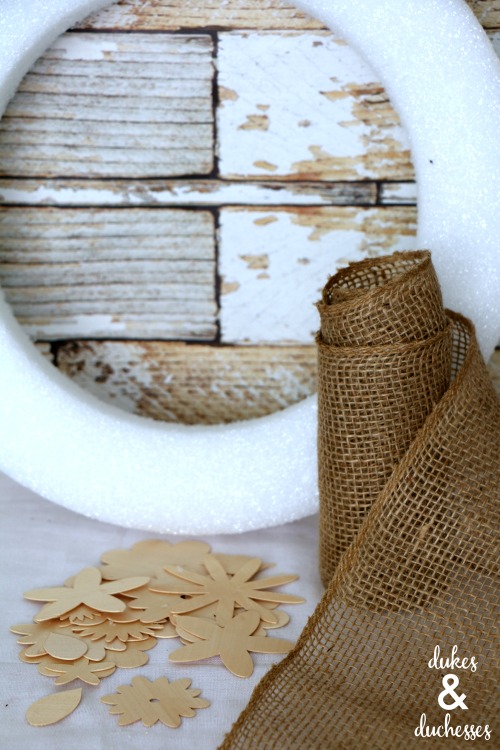
My mantel decor got switched up this week and I added a new wood veneer floral wreath that I made with my Cricut Explore Air 2! One of the reasons I wanted a Cricut was the ability it has to cut different mediums like wood, metal, and leather, and I was really looking forward to experimenting with something other than paper. I was so impressed with how easy it was to cut the wood veneer flowers and I love the look of this three dimensional floral wreath in neutral tones!

When I was at a woodworking shop a few weeks ago, I picked up a package of light wood veneer sheets with the thought of doing a project on the Cricut.
While I usually love a whole lot of color, I thought a neutral wreath with different flower shapes would look really neat.

This project was really easy to make.
I opened Cricut Design Space and set a canvas to look just like the pieces of wood veneer. I made it the same size and even shaded it to look like the wood veneer.
This is one of the features I love. While it’s not completely necessary, it really does help you picture the final project and it helps eliminate wasted material since you can see exactly how everything will fit on the product you’re cutting.

To make the flowers, I used images that are available on Cricut Design Space.
I did a search for “flowers” and then selected “single layer” to narrow it down. I selected five different flower shapes …
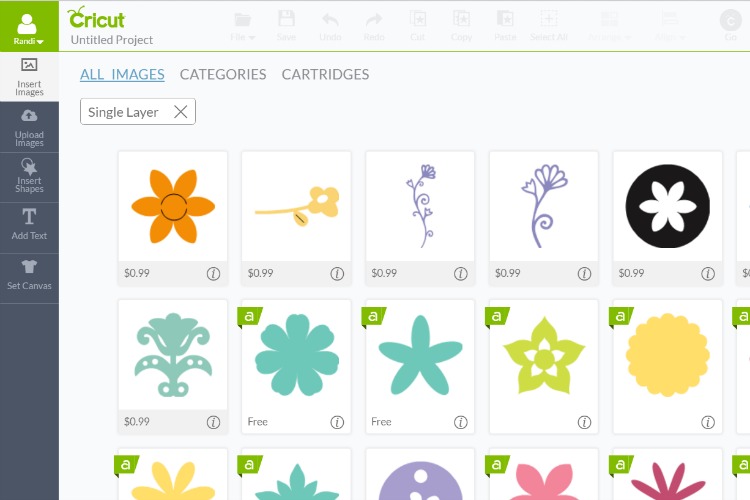
… and then used the “duplicate” feature to add duplicates of each type of flower. I altered the sizes on some so there would be a variety of shapes and sizes on the wreath. I also added two different leaf shapes for a bit of interest.
When preparing the first batch of flowers for cutting, I moved some of the flowers off the canvas …
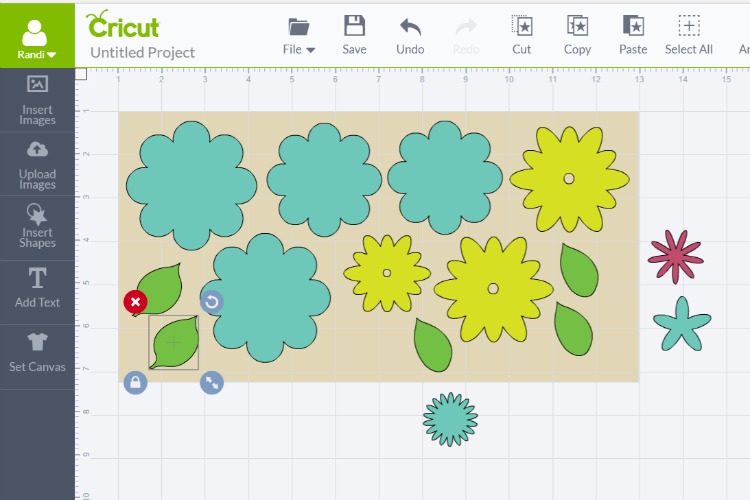
… and then hid them by selecting the little eye next to the layers on the right. I could still see what layers I had but they were hidden and wouldn’t cut until I wanted them to.

I’m still getting used to the layering system that Cricut uses and when I prepared to cut, I realized it was going to cut in batches by color selection rather than cutting like it shows below. I wanted it to cut as shown in order to maximize the use of the wood veneer so I used the sync feature to sync all the layers. Once I did that, they all appeared as the same color and I could cut in the layout shown below.

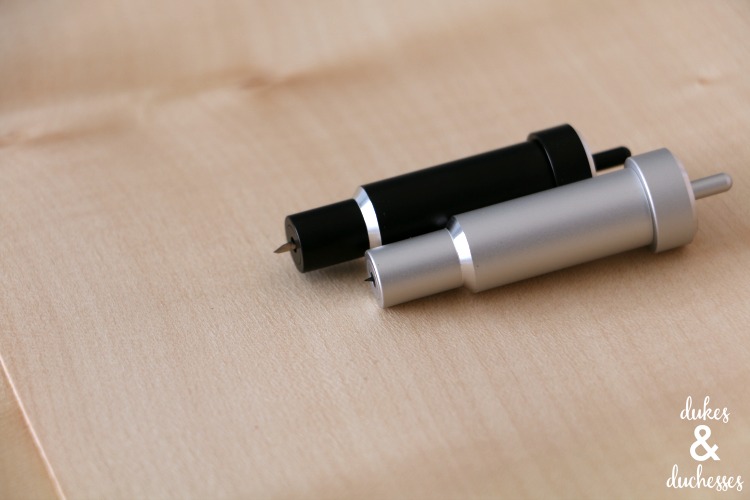
Because I was cutting through wood veneer, I used the deep cut blade {the black one} rather than the regular blade. You can see the difference in the blade length in the photo below.
I turned the dial on the Cricut to custom and then selected the wood option from the drop-down menu.

The flower shapes cut perfectly in the wood veneer. The machine actually does duplicate cuts with this setting, going around the flower shape a number of times.
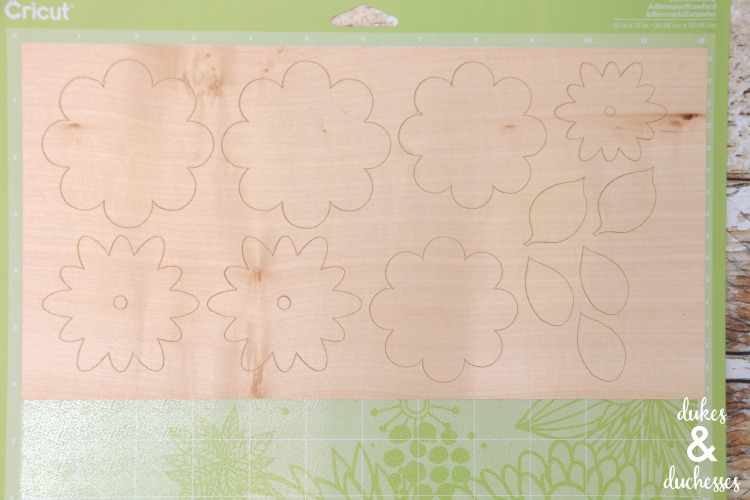
I used the spatula to lift the flowers from the mat {if you just attempt to peel them off, you may crack the veneer so be sure to use the spatula} and cut a few more sheets until I had the number of flowers I wanted.

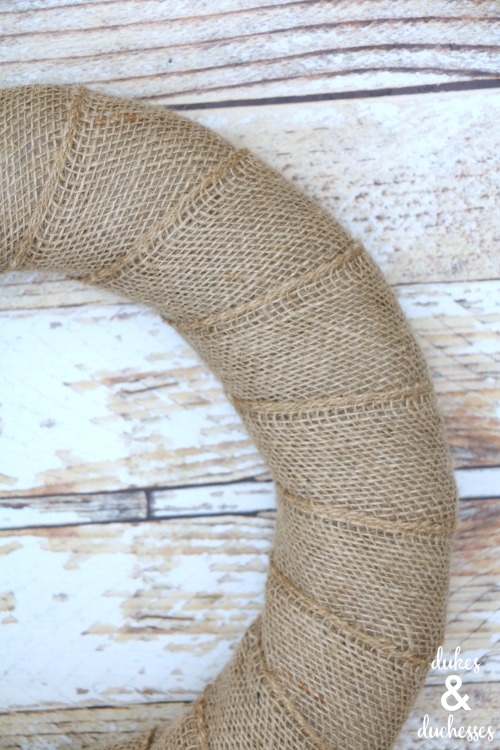
To make the floral wreath, in addition to the wood shapes, I also used a styrofoam wreath form and burlap ribbon.
I wrapped the burlap around the wreath form, securing the ends with hot glue …
… and then attached the wood veneer flowers, laying larger, simpler shapes on the bottom, and adding smaller and more complex shapes randomly on top.

Once all the flowers were attached with hot glue, I tucked the leaf shapes in around the edges.

This floral wreath is so simple but the neutral monochromatic color scheme really shows off the texture of the shapes and the wreath looks perfect attached to my vintage window.

I can’t wait to tackle some more projects and will definitely be making something with wood veneer again!

If you missed my last post featuring the Cricut Explore Air 2, be sure to take a peek at the features I love and check out the monogrammed popsocket I made!


I have been dying to try this with my Cricut!!!!!!!!!! Love it!
This turned out beautiful! We would love to have you at our To Grandma’s house we go link party that opened this Wednesday morning and lasts all week!
This is so pretty. I would love for you to link up at our new link party #iDIYedthat.
This is beautiful, thanks for sharing. Would you happen to know how thick the wood veneer sheets that you used were? I just got a Cricut Explore Air a couple weeks ago and have attempted 1/16″ balsa, 1/32″ birch plywood, 1/64″ birch plywood and two different wood veneers (oak and pine) and my Cricut has not been able to cut through any of it! I’m using my deep cut blade and playing around with the pressure and multi-cut settings but no success 🙁
I don’t know the exact thickness because I no longer have the package but it’s a pretty standard balsa. I had no issue cutting through it at all but I’ve heard others have as well. I wish I had some better tips for you!
I read somewhere that the Explore Air 2 can’t use the deep cut blade. Did you have to modify it?
No, the deep point blade can be used with the Maker and the Explore family. Maybe you’re thinking of the knife blade … that can only be used with the Maker.
Very cute. Would you be able to run the cut flowers through again (I would guess not removing them from the mat) and write on them?
That’s a brilliant idea! But you wouldn’t have to run them through again. You would add the text or design when you’re in Cricut Design Space and then attach the flowers and design together. That way, the machine would do it all at once.
Can you add a link to buy the veneer sheets you used?
Sure! I actually used wood veneer from a wood shop on this project but I’ve used this product for other projects and it works great: http://shrsl.com/24jyk.