• Home
  • Start Here
    • About Dukes and Duchesses
    • Collaborate/Contact
    • Privacy Policy
  • Holidays
    • New Year’s Eve/Day
    • Valentine’s Day
    • leap year
    • St. Patrick’s Day
    • April Fool’s Day
    • Easter
    • May Day
    • cinco de mayo
    • Mother’s Day
    • Father’s Day
    • Fourth of July
    • Halloween/Harvest
    • Thanksgiving
    • Christmas
  • Crafts
    • general crafts
    • Cricut projects
    • printables
    • painting
    • sewing
    • knitting
  • DIY
  • Repurposed
  • Parties
    • Birthday
    • Entertaining
  • Recipes
  • Home Decor
    • Decor
    • home improvement
    • plants and garden
    • housekeeping
    • organization
  • travel
    • general travel
    • Dallas

Dukes and Duchesses

Dallas Fort Worth Creative Lifestyle Blogger

building painting · Written by Randi Dukes

DIY Headboard Bench

1557 shares
  • Tweet39
  • Share416

I’ve been slowly trying to finish up projects and clear out the vast collection of salvaged treasures in my garage.  Have you got a pile like that?  A couple of years ago a friend of mine gave me an old headboard and footboard and I finally created a DIY headboard bench for my back patio.  I know headboard bench tutorials are a dime a dozen but I thought I’d throw this one in the pot as well.  I just love the way it turned out and it was really simple to make!

DIY headboard bench

To make a headboard bench, you’ll need a headboard and a footboard along with 1×4 inch and 1×6 inch pieces of wood.

old headboards

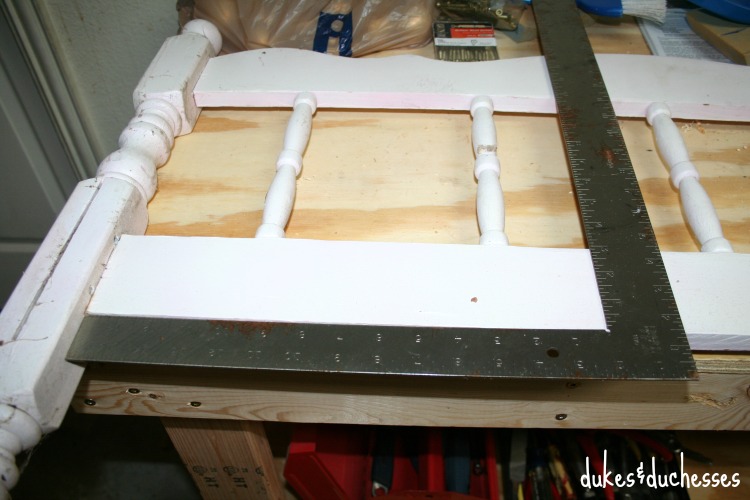
From the posts on each side of the footboard, measure 18 inches and mark a cut line.  Using a saw, cut evenly along that line.  You’ll have two pieces of footboard, each with a post on the end, and a short extra piece of footboard from the middle {throw that piece out}.

cutting footboard for bench

Using a kreg jig {affiliate link}, create pocket holes in the footboard, apply wood glue to the end of the cut footboard, and screw each piece of footboard to the solid end posts on the headboard.

kreg jig holes to attach armrest

Cut a piece of 1×6 inch wood into two pieces the width of the bench, from the inside of one post to the inside of the other post.  Drill pocket holes into the ends of each piece and attach one piece across the front of the bench, joining both front posts, and one piece across the back of the bench to support the piece of wood already on the headboard {be sure the pocket holes are on the inside so they won’t show when the bench is finished}.

additional back support

Using a piece of 1×4 inch wood, cut planks to create the seat of the bench.  The pieces need to fit the depth of the bench with about 1/4 inch overhang on the front.  If the pieces won’t fit evenly across the bench, you’ll need to rip one or two to the width you need {I placed two thinner boards on each end of the seat}.  Lay all the pieces before you begin nailing.

Using a nail gun {I used my Ryobi Airstrike Cordless Brad Nailer, a tool I adore} attach the planks to the front and back boards, making sure the nails are driven in fully to avoid snagging legs or clothing.

plank seating on headboard bench

That’s it!  This DIY headboard bench is a super easy build and can be knocked out in an hour or so.  Fill the pocket holes if desired {I didn’t bother}, sand the bench, coat it in paint, and place it in the perfect spot in your home or yard.

outdoor bench for outdoor living

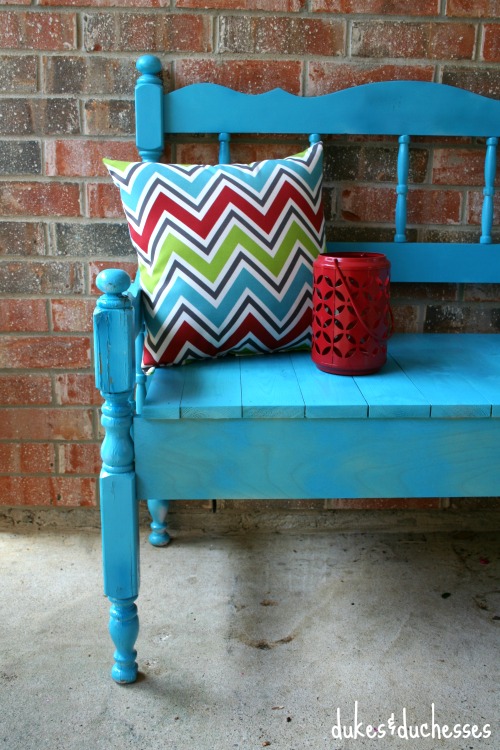
I painted my bench in a vibrant turquoise but allowed some of the old paint to chip through {chippy paint is my love language}.

distressed paint on headboard bench

The addition of a colorful pillow and a little outdoor lantern …

outdoor seating

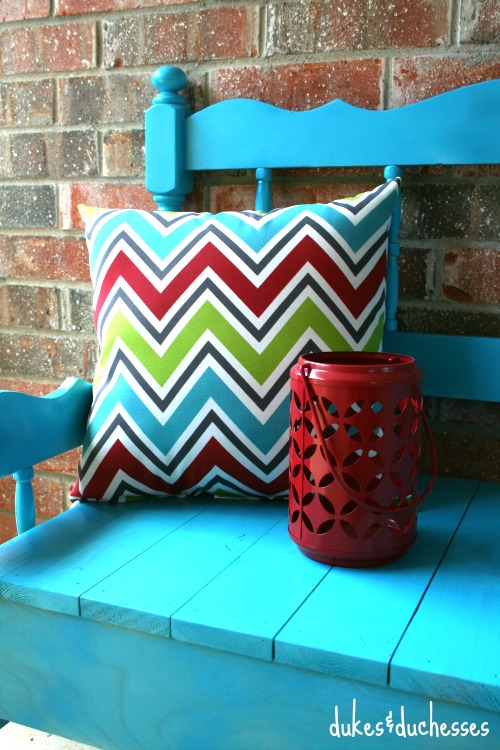
… has made this a fun and colorful spot in our backyard.  I’m hoping this will be my regular reading spot this summer.

headboard benchOne can dream, right?


3 Comments

About Randi Dukes

I’m Randi, a Dallas-based mom of five kids, ranging from third grade to college and including a set of twins. I love strong coffee, craft and DIY projects, my planner, and my big ol’ family. When I’m not creating something for my blog, I can be found in the car, running kids from one place to another. I’m the one knitting at the red light. Connect with me on google+ | twitter | facebook

« Laced Leather Coffee Cuff
How to Make a Felt Tablet Cover »

Comments

  1. Amanda says

    May 12, 2015 at 8:41 am

    So adorable! I love it!

    Reply
  2. JoAnn & SweetPepperRose says

    August 14, 2015 at 6:03 pm

    Love the color! My husband and I make a few of these benches.

    Reply
  3. Ann Gathings says

    April 23, 2019 at 10:34 am

    I have antique beds that I inherited from my family. Thank you so much for a practical way I can save and use them every day!

    Reply

Leave a Reply Cancel reply

Your email address will not be published. Required fields are marked *

  • Facebook
  • Instagram
  • Pinterest
  • Twitter
  • YouTube

Welcome to Dukes & Duchesses!

dukes and duchesses profile photo

I’m Randi, a mom of five living in Dallas. I love strong coffee, long lists, bright colors, thrift stores, repurposed junk, and power tools.

how to plant a sweet tea garden

Southern Sweet Tea Container Garden

colorful wood DIY garden marker

DIY Wood Veneer Plant Markers

creative outdoor garden ideas

8 Creative Ideas for Your Outdoor Garden

DIY herb garden markers

DIY Upcycled Knife Garden Markers

upcycled cutting board sign in beverage garden

DIY Beverage or Cocktail Garden

Dukes and Duchesses is a participant in the Amazon Services LLC Associates Program, an affiliate advertising program designed to provide a means for sites to earn advertising fees by advertising and linking to Amazon.com.
Any content on this website is created for inspirational purposes only. You assume your own risk for using any methods, tools, or supplies suggested here. Follow proper guidelines for every tool or supply used and obtain professional guidance as needed.

Copyright © 2025 · Randi Dukes · Wordpress Hosting by SERVOUSLY

Copyright © 2025 · Divine Theme on Genesis Framework · WordPress · Log in